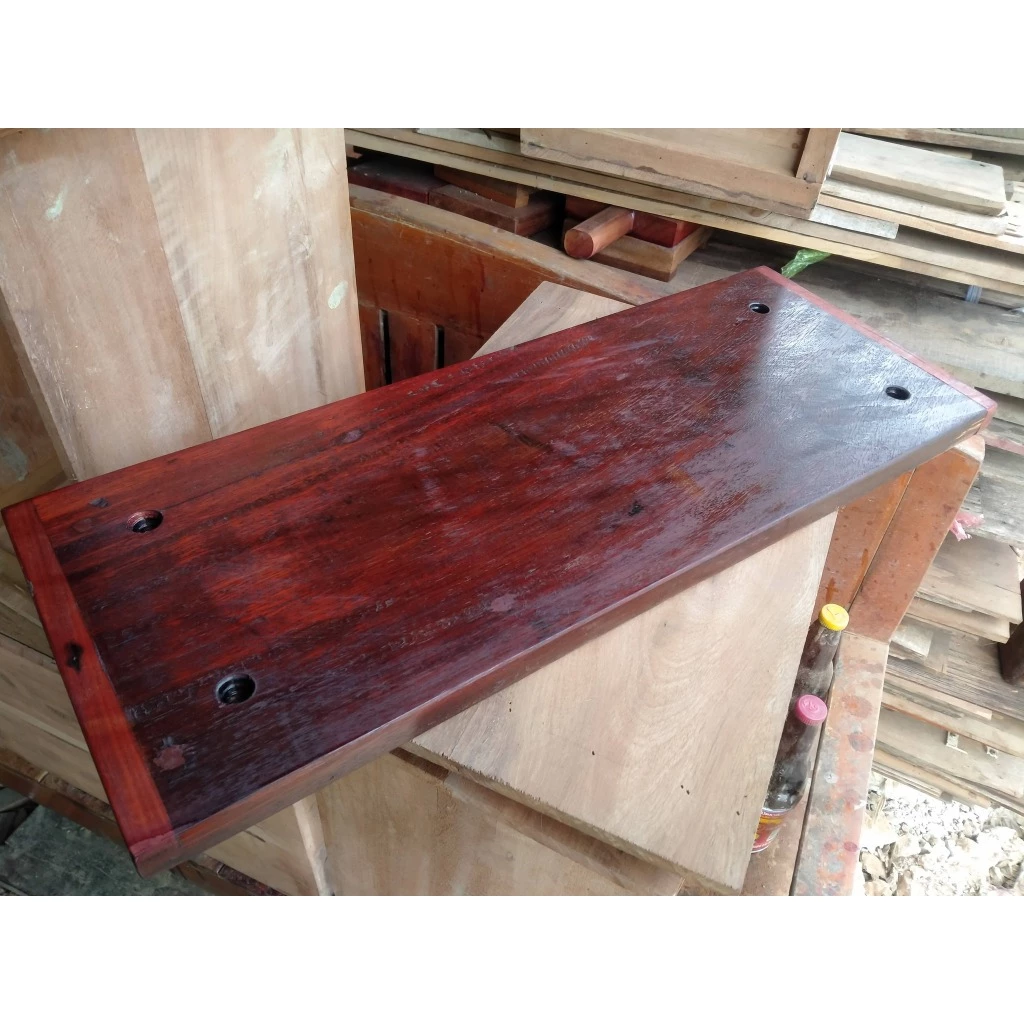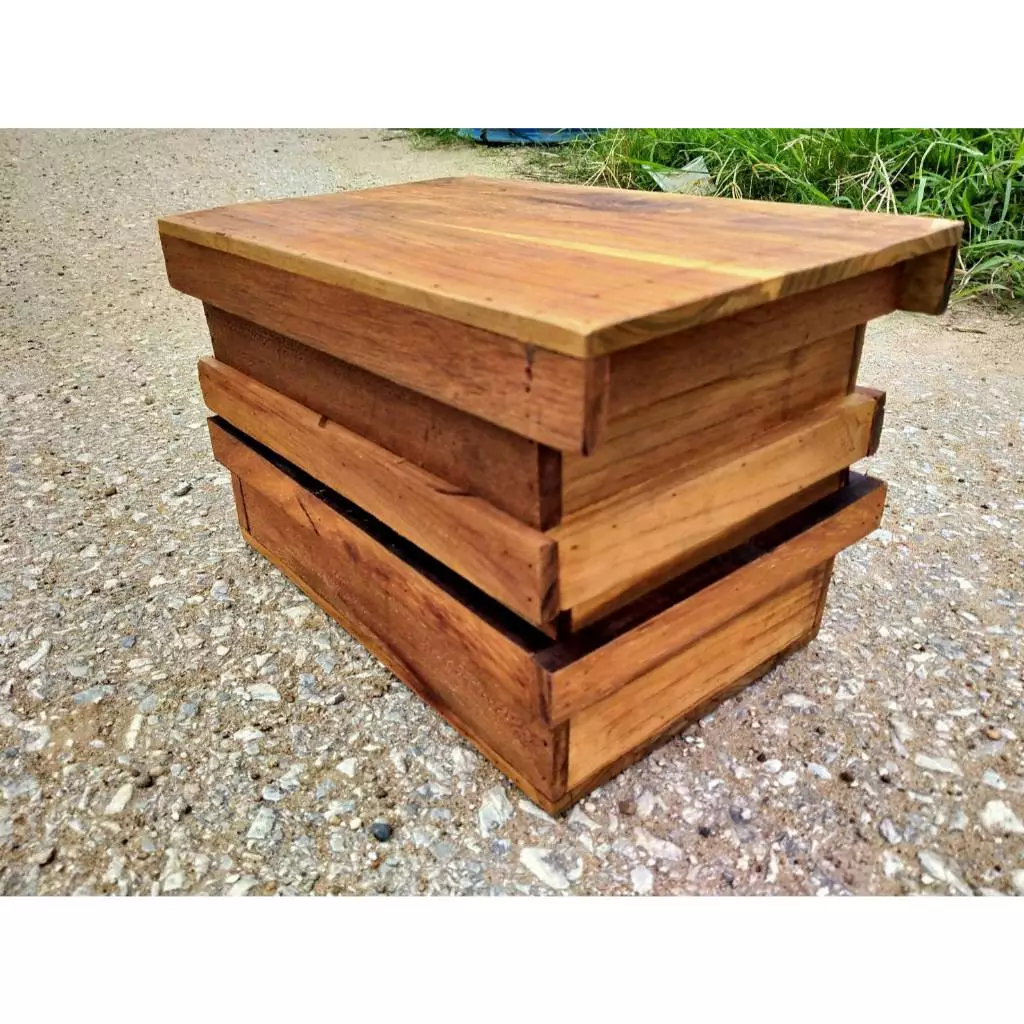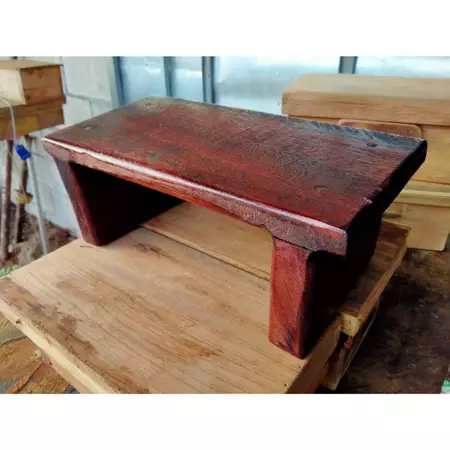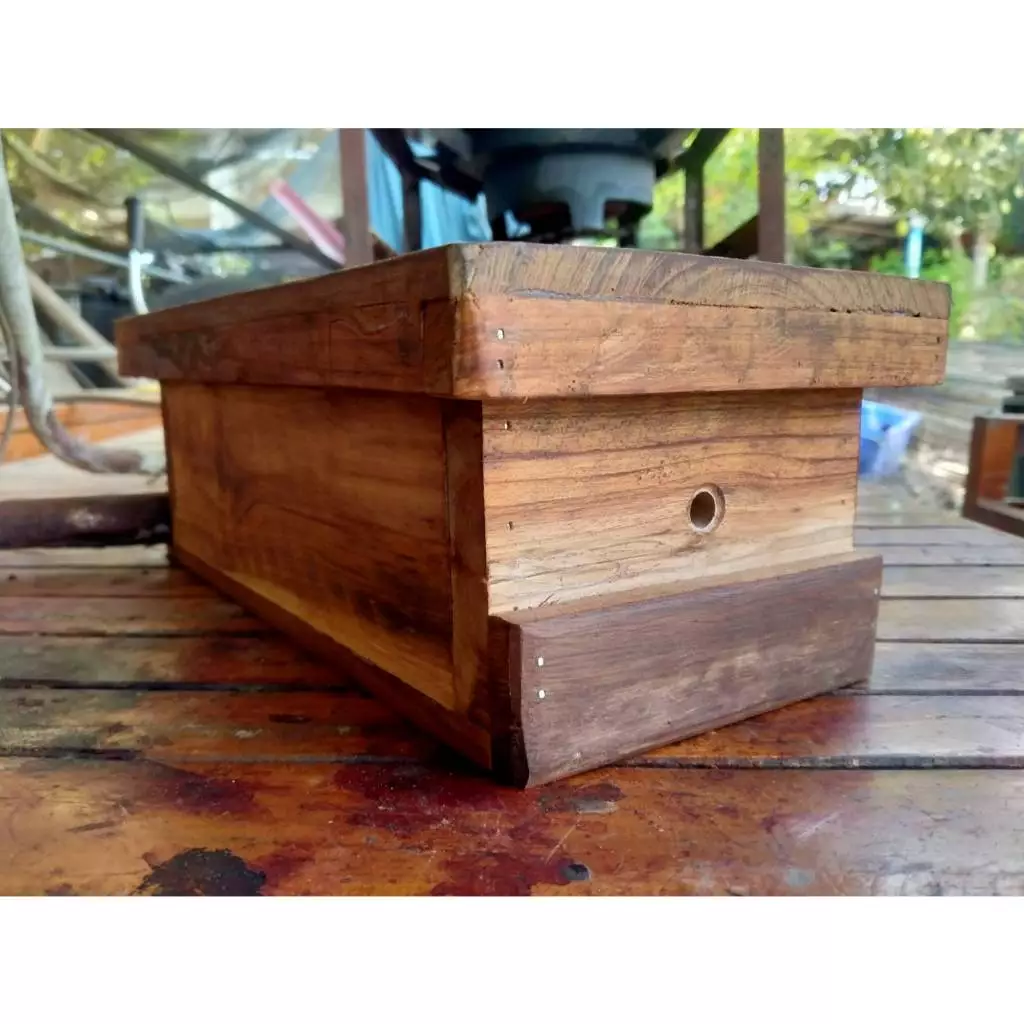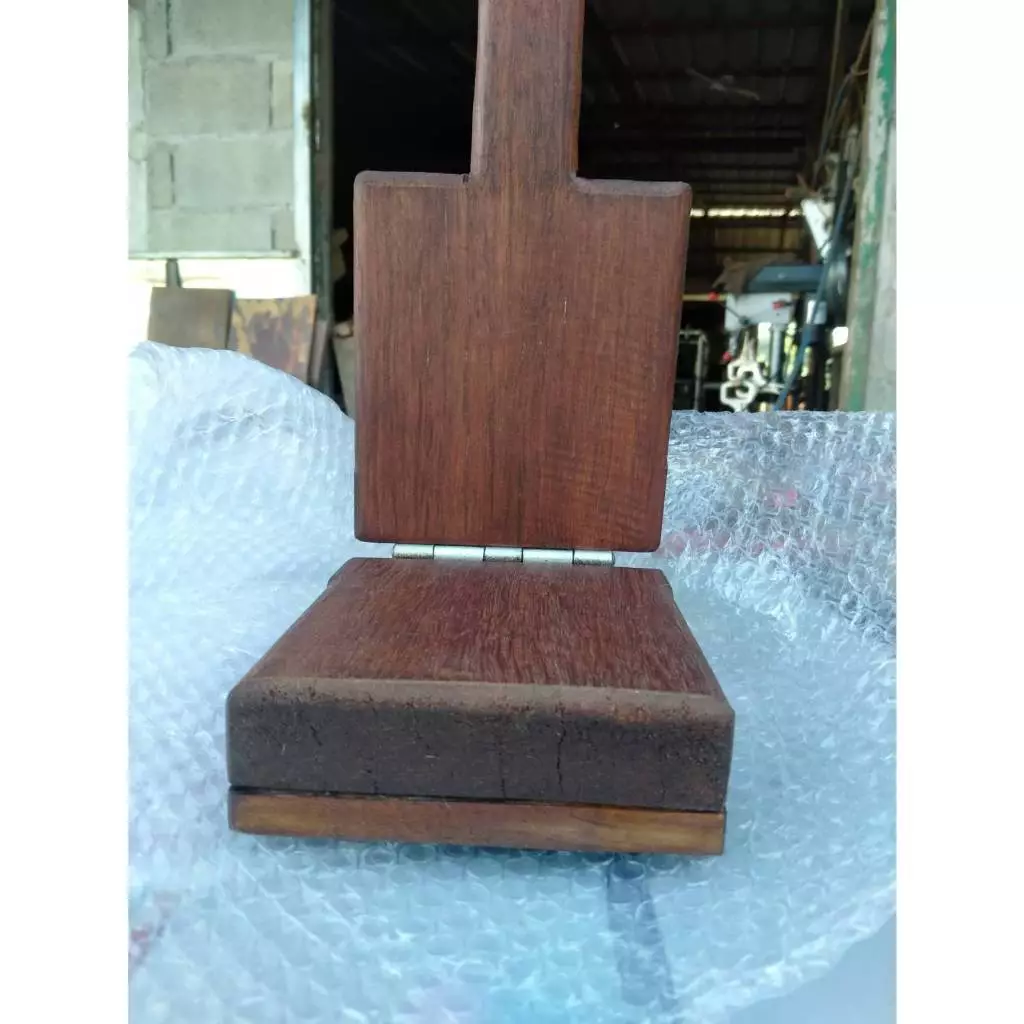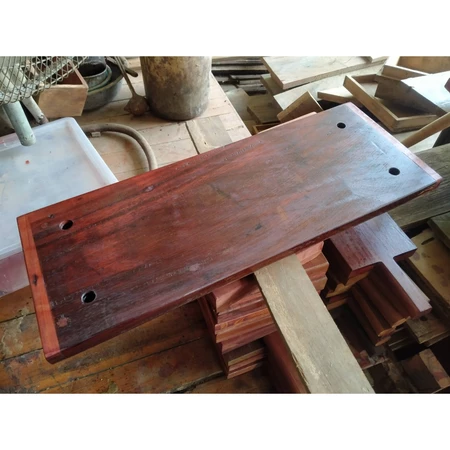

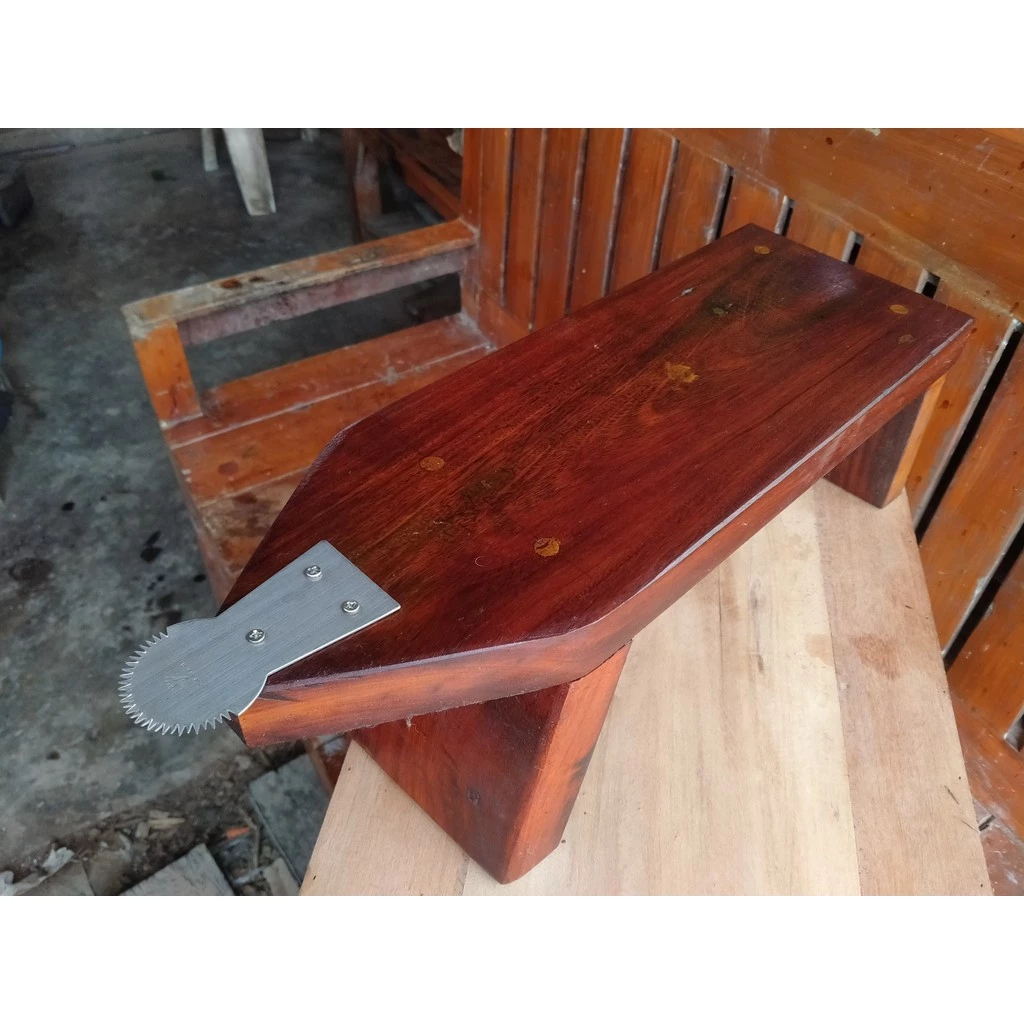






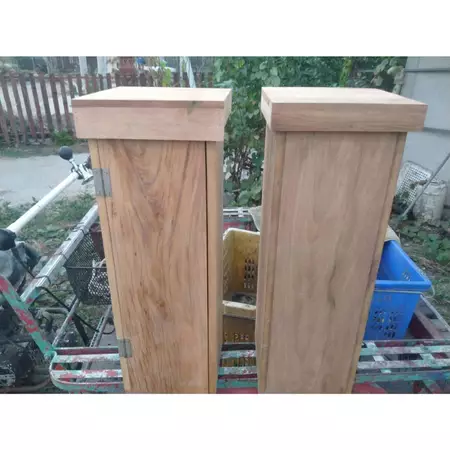
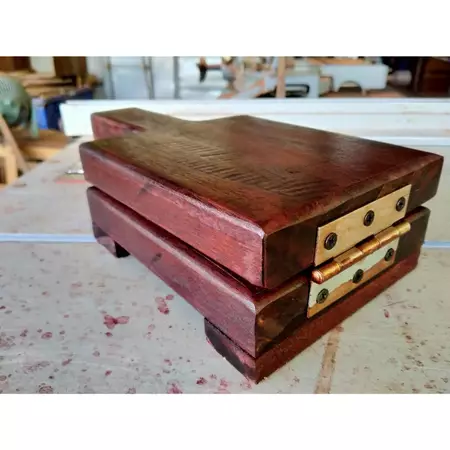




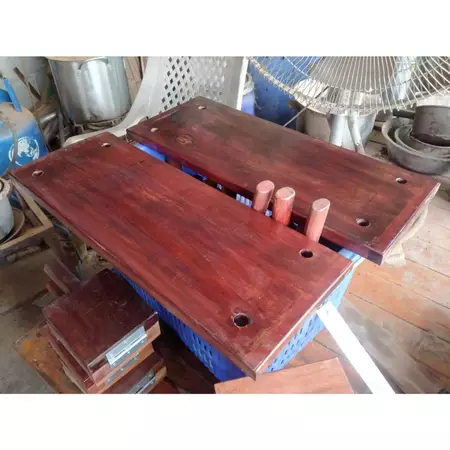




ชิงช้าไม้เนื้อแข็ง
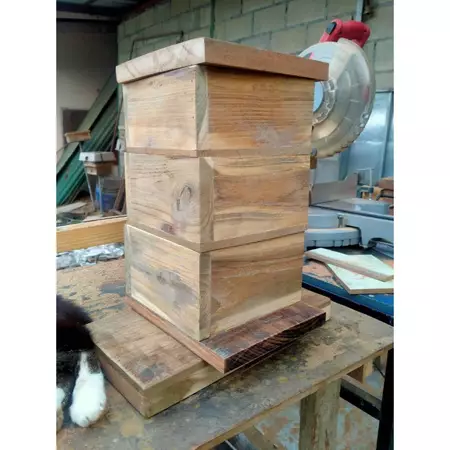
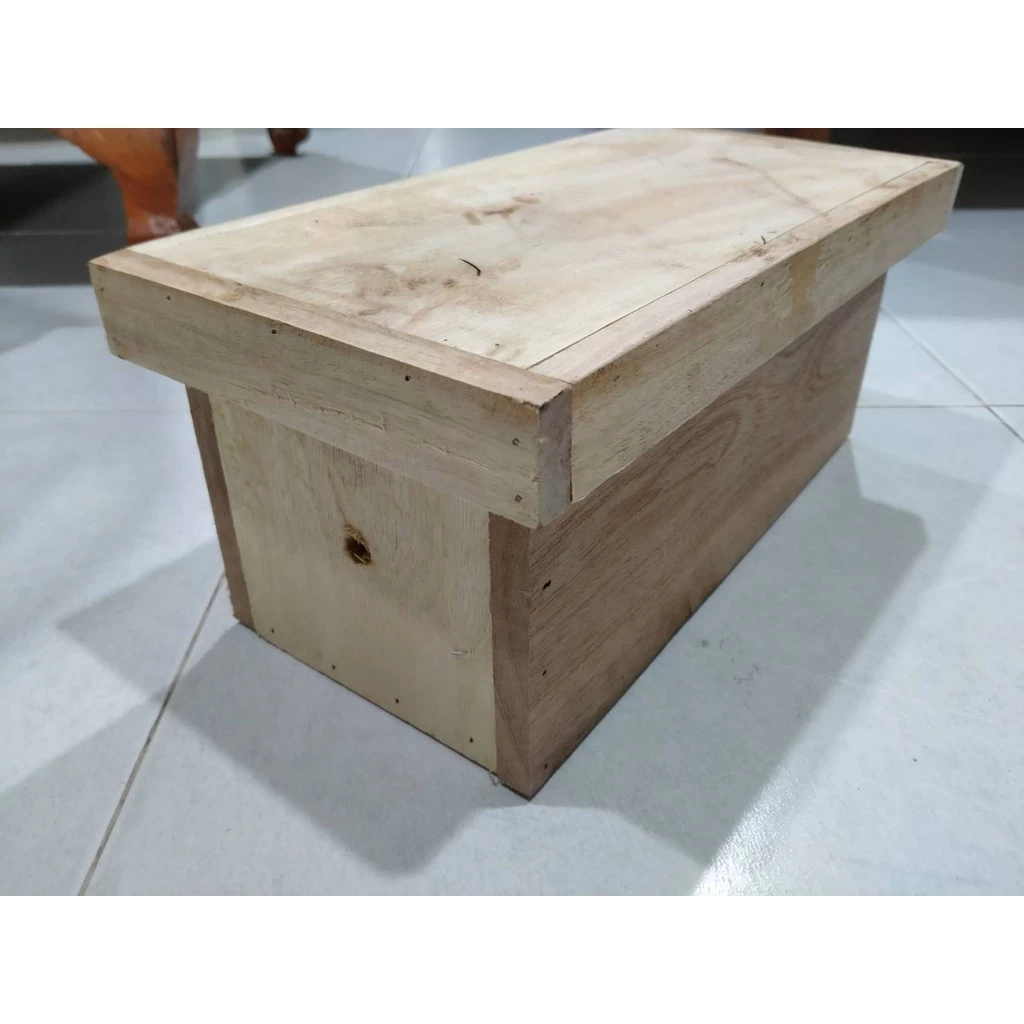
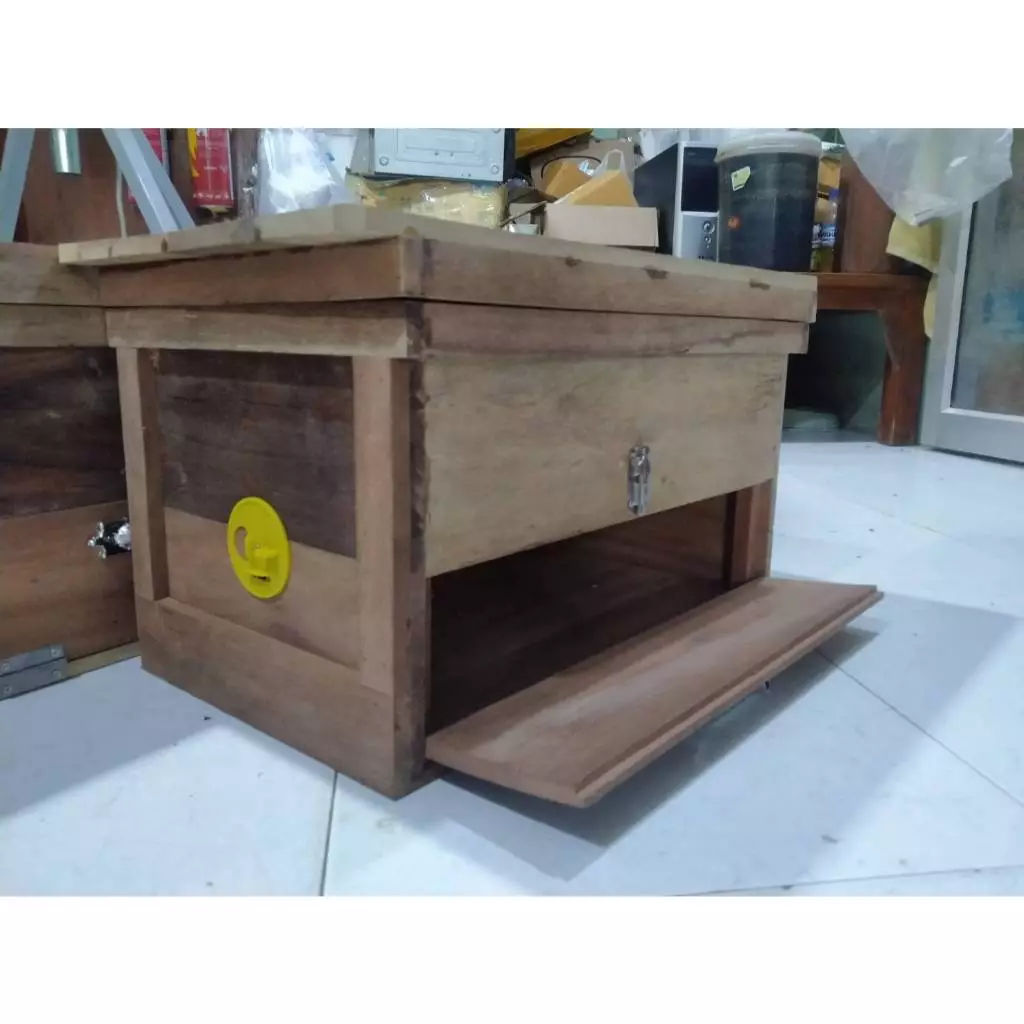
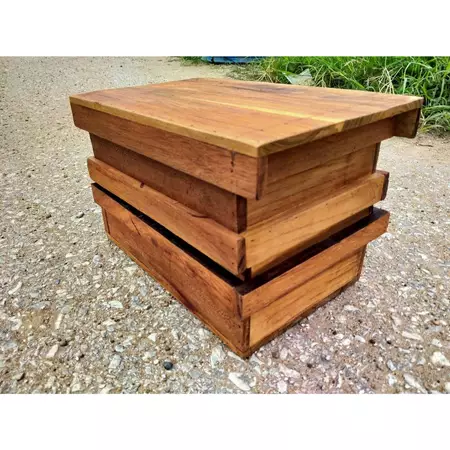
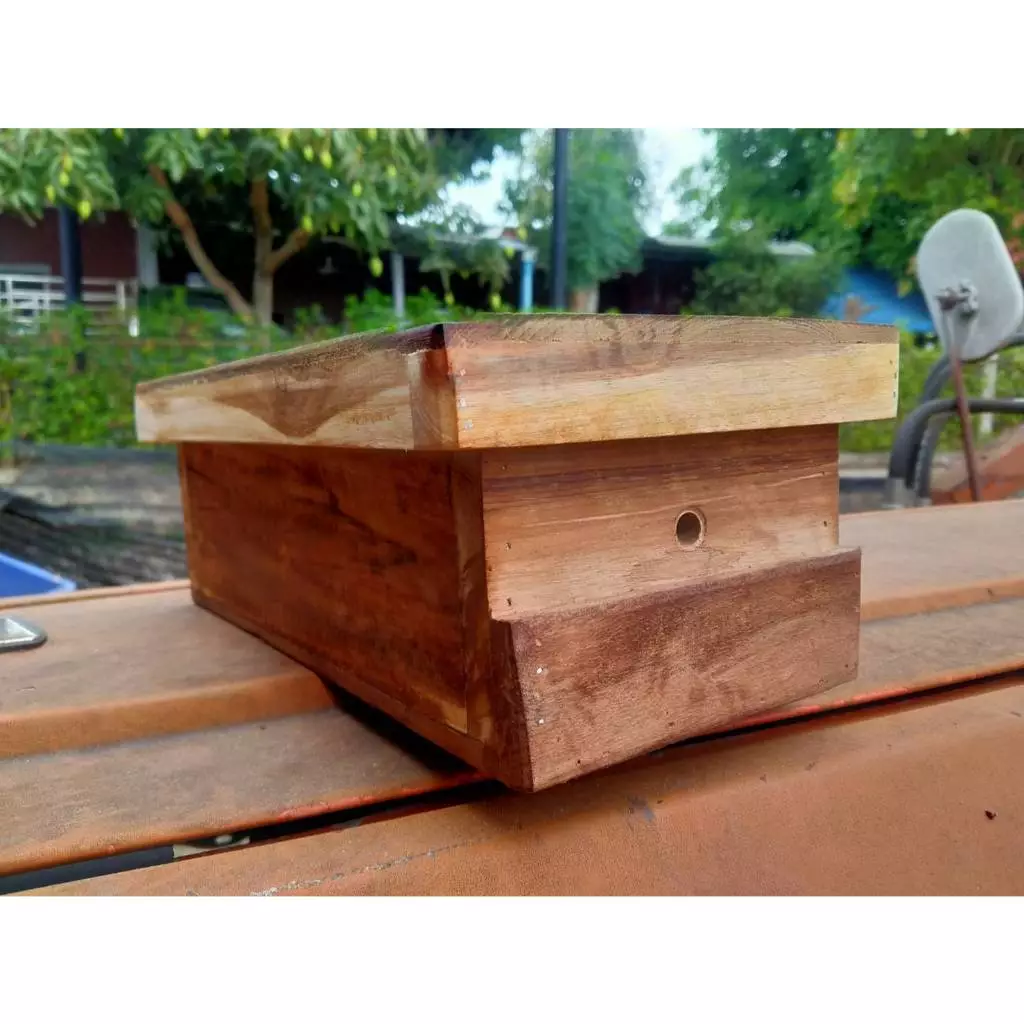
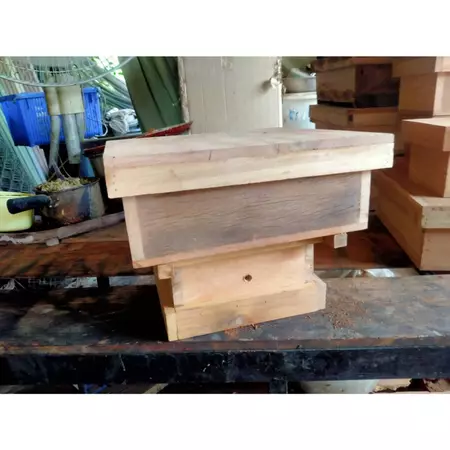
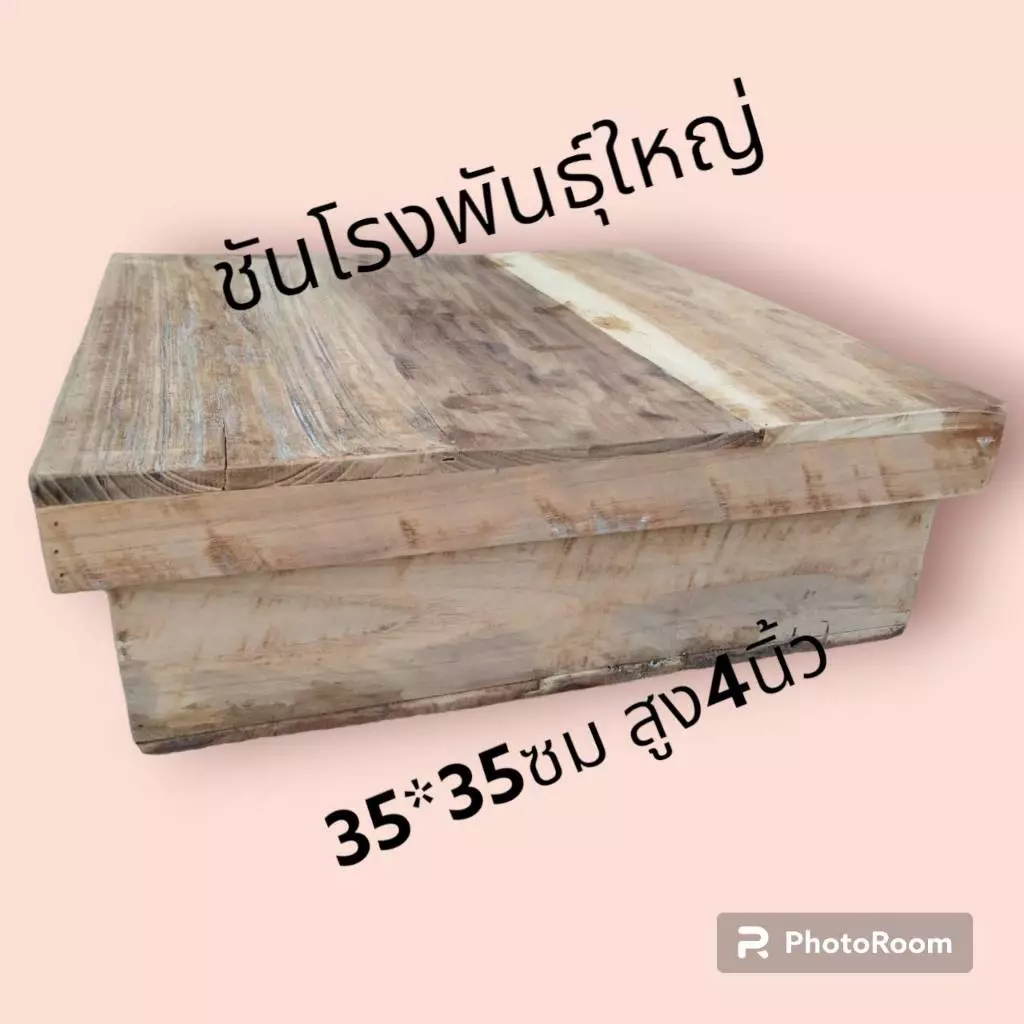
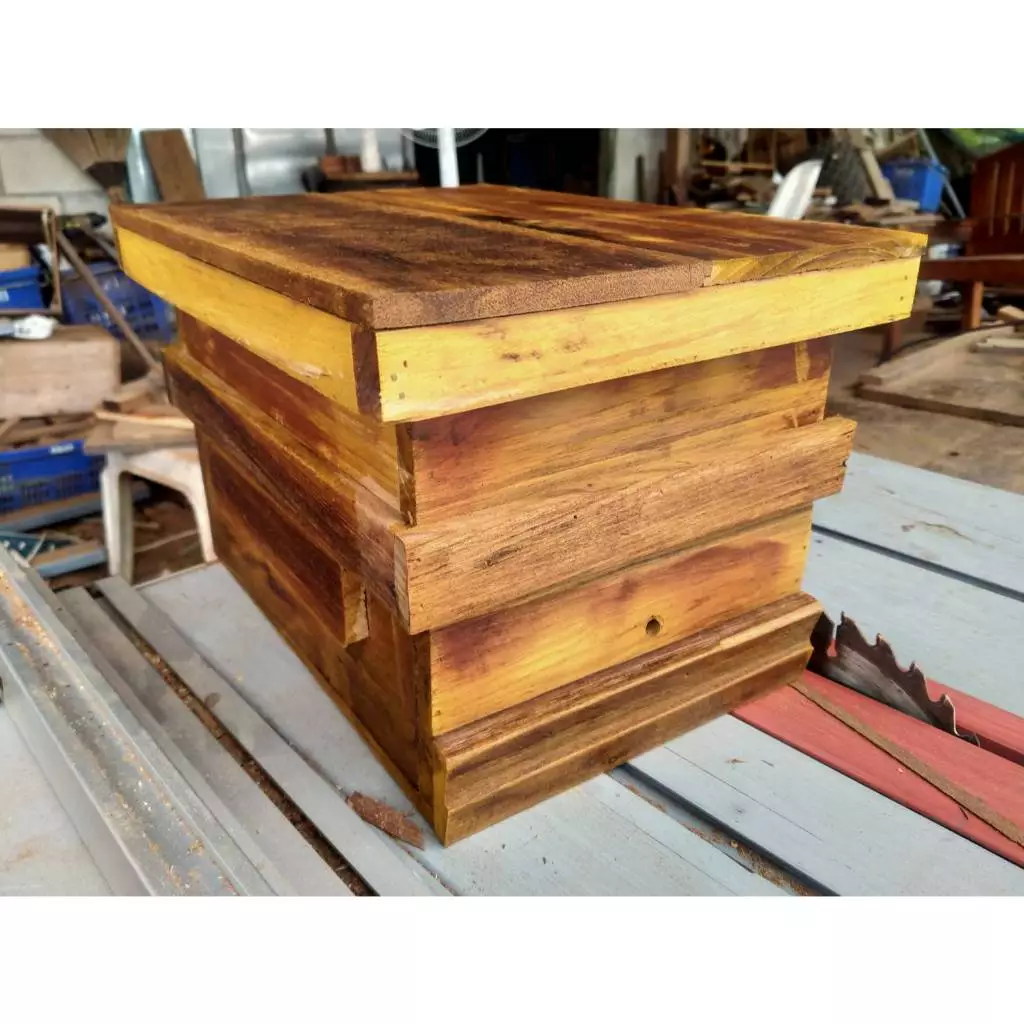
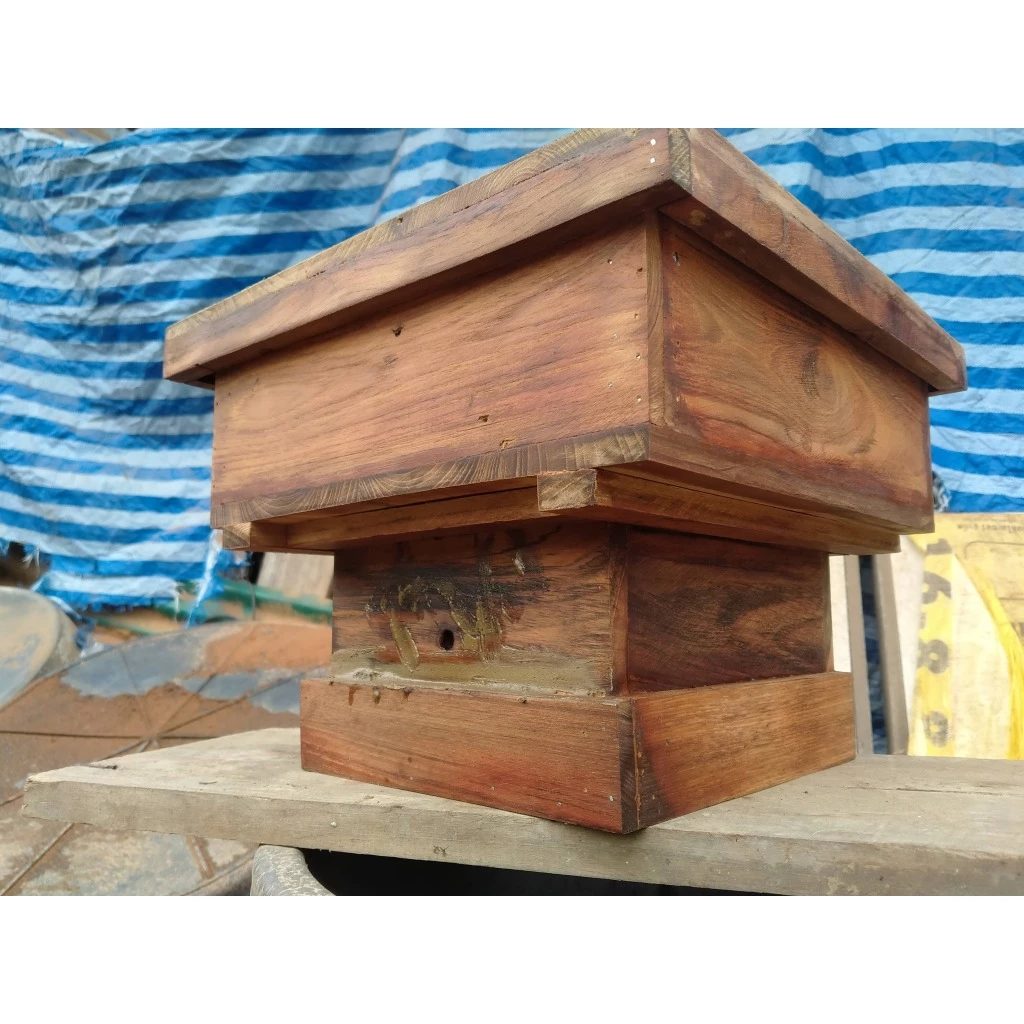
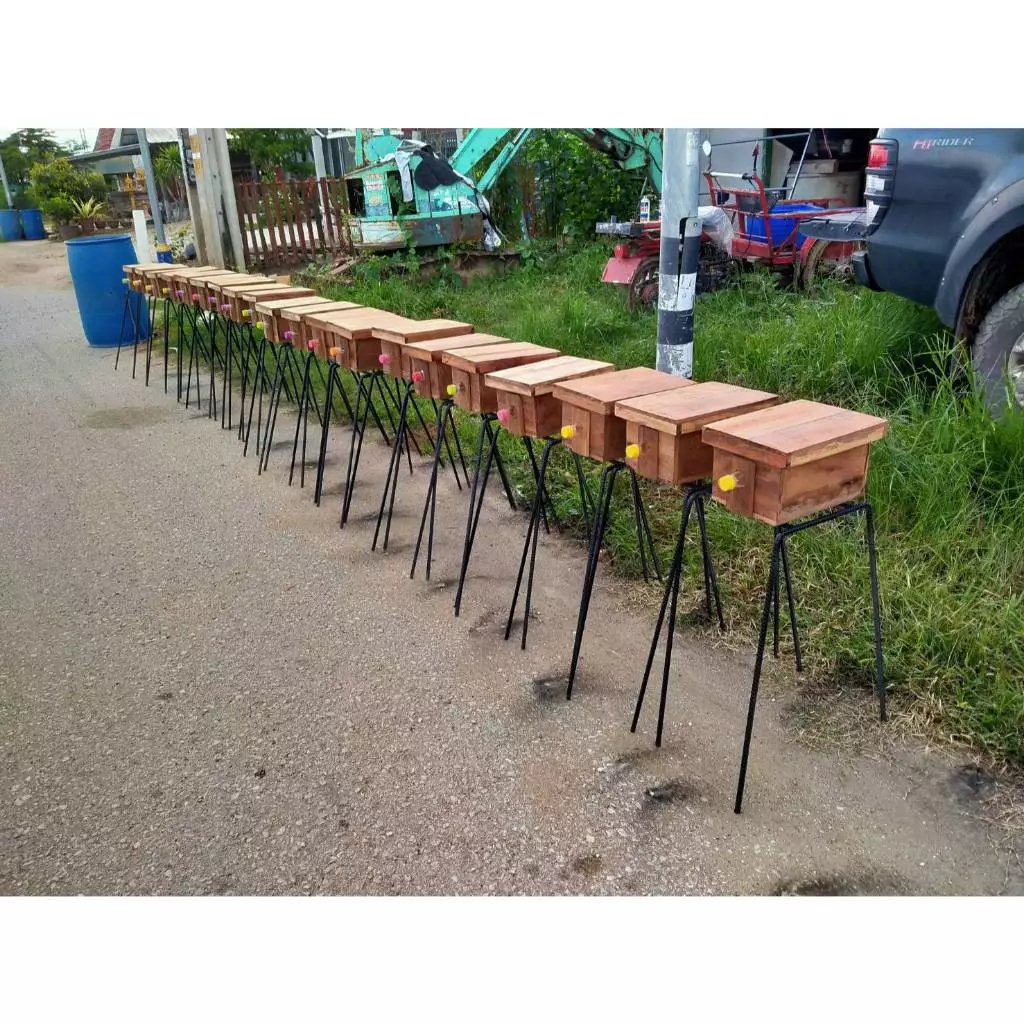
กล่องเลี้ยงชันโรง แบบ 2 ชั้น ขนาด A4
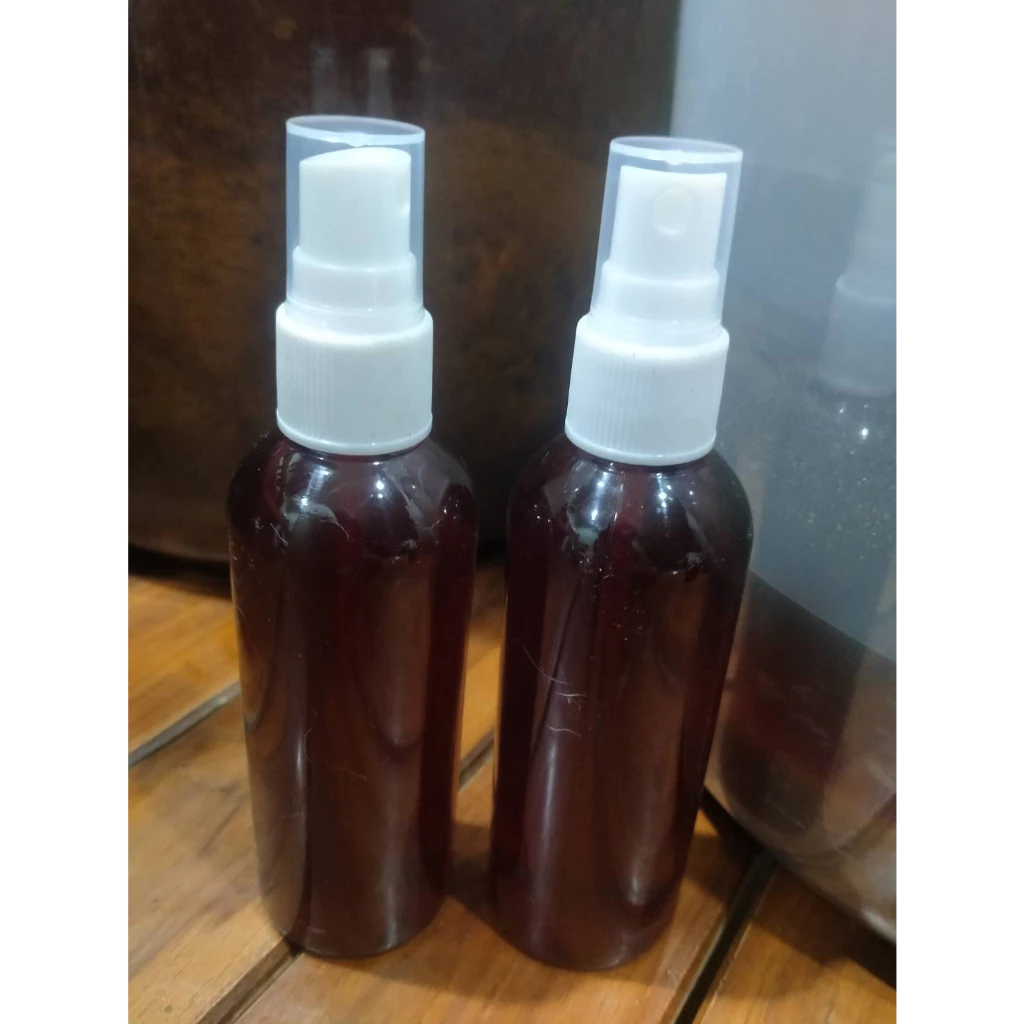
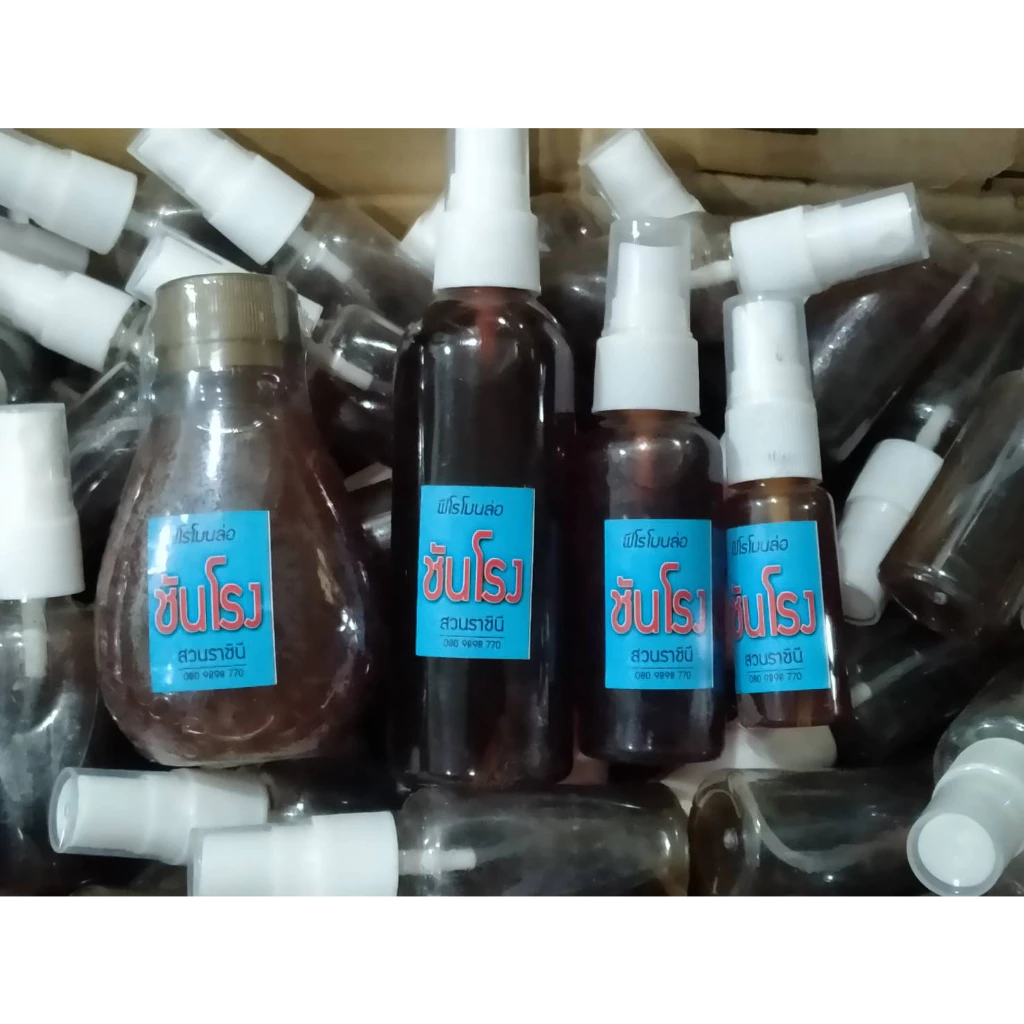
ฟีโรโมนล่อชันโรง
กระต่ายขูดมะพร้าวหนาพิเศษ
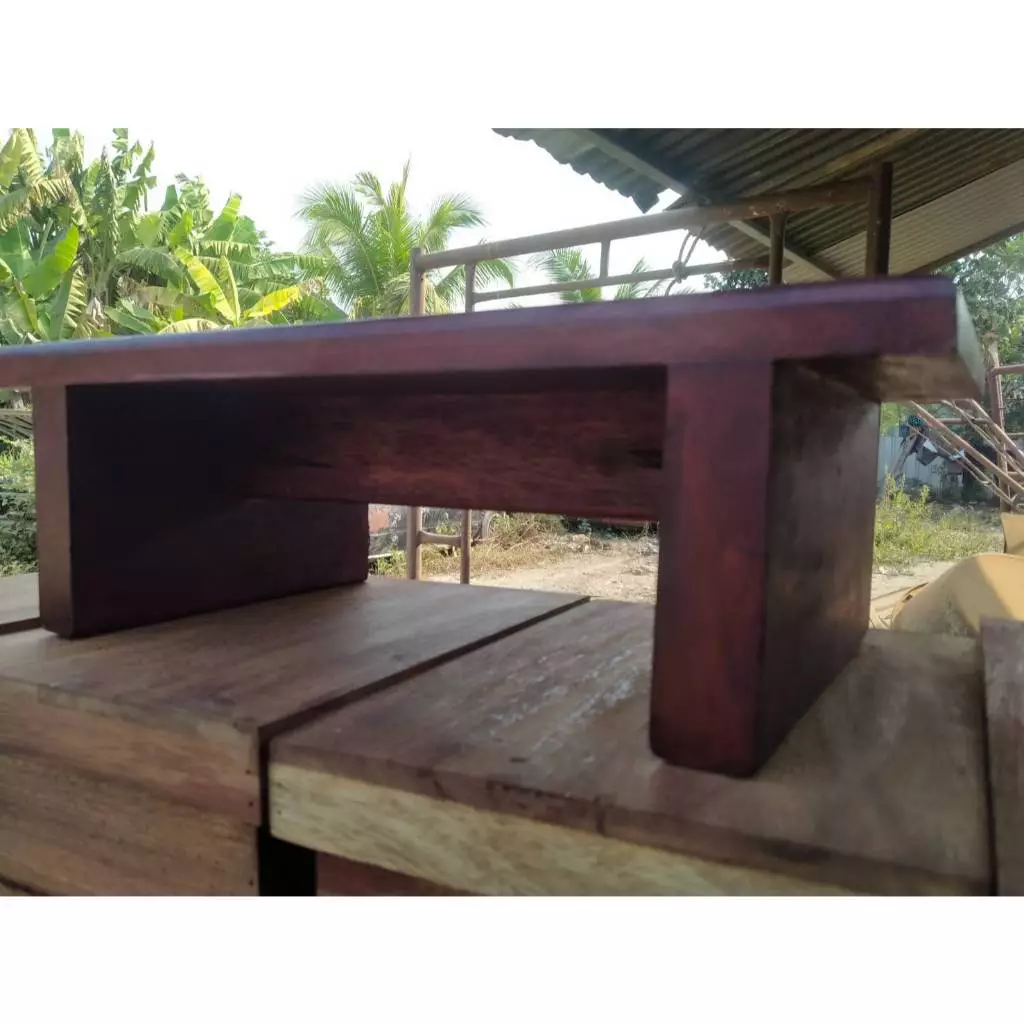
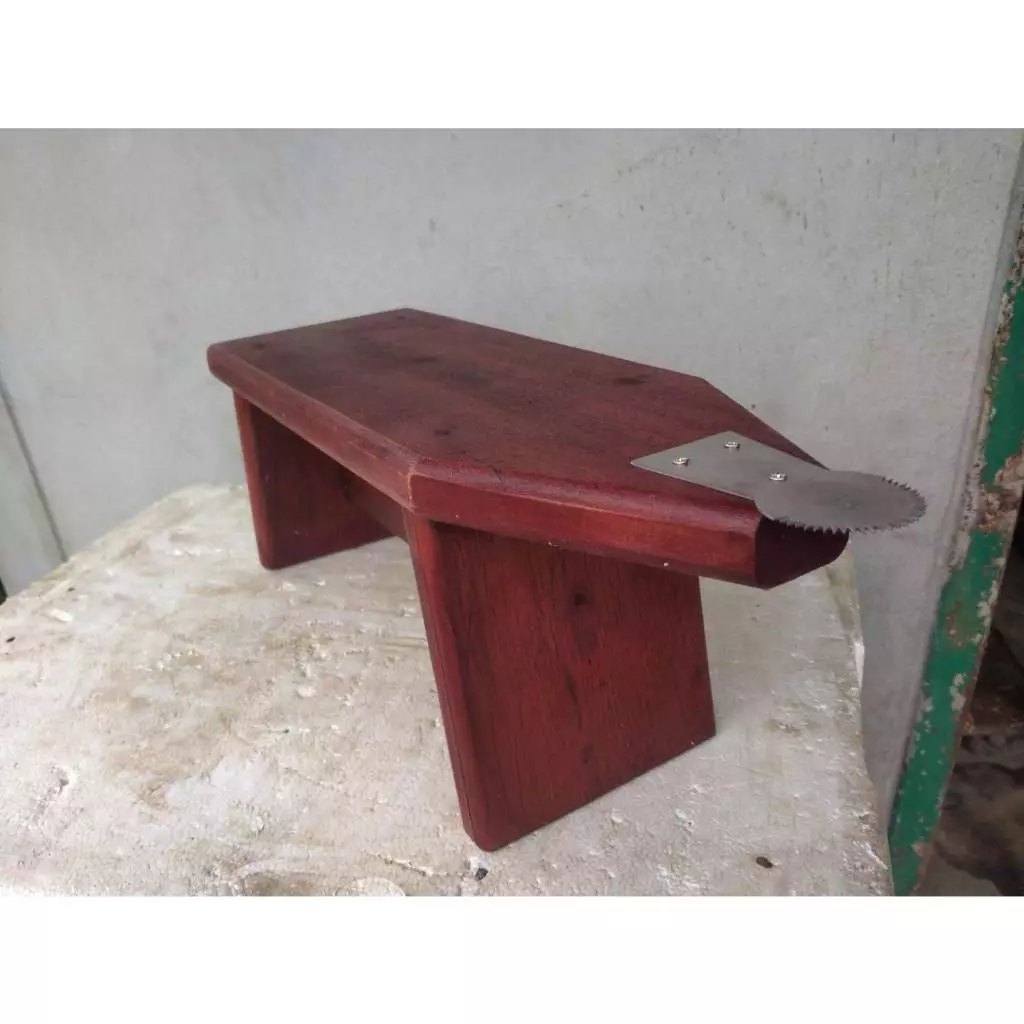
ม้านั่งไม้เนื้แแข็ง
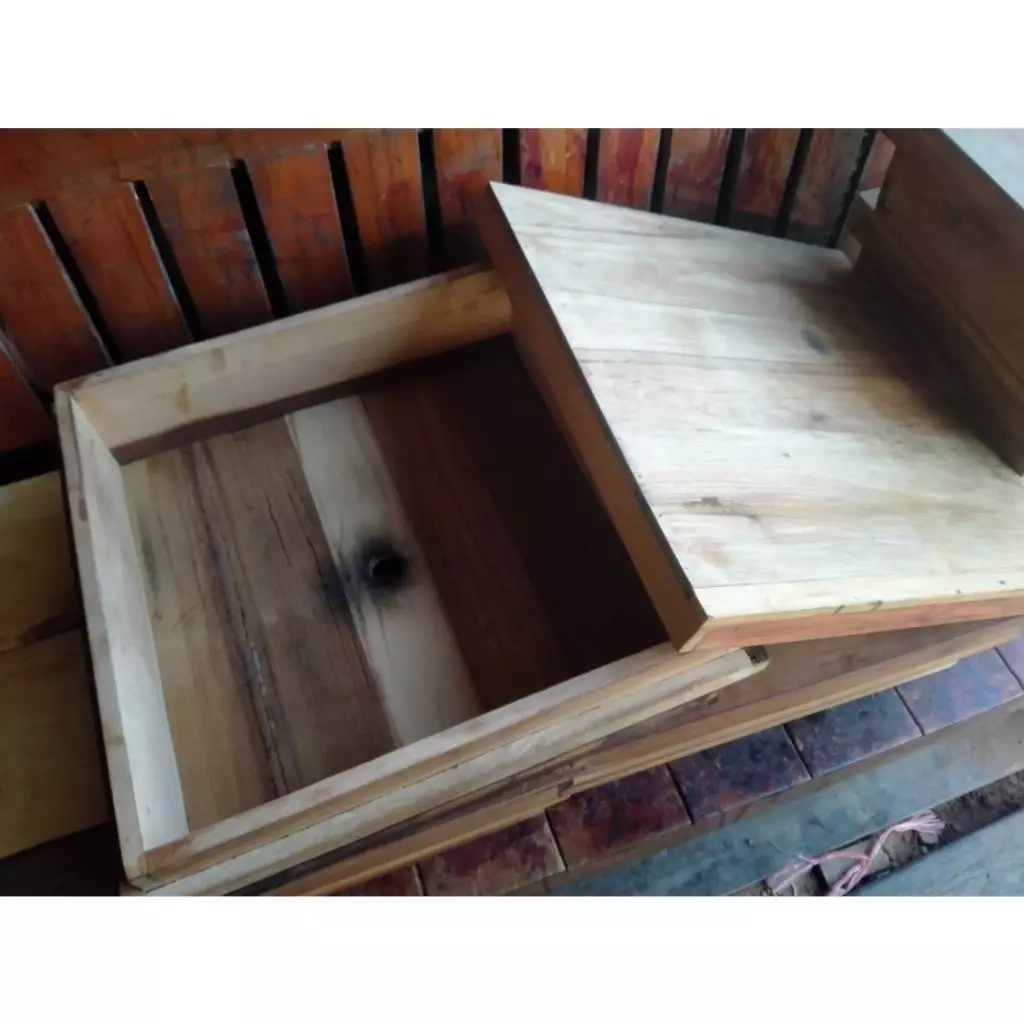
ถาดน้ำหวานสำหรับชันโรง
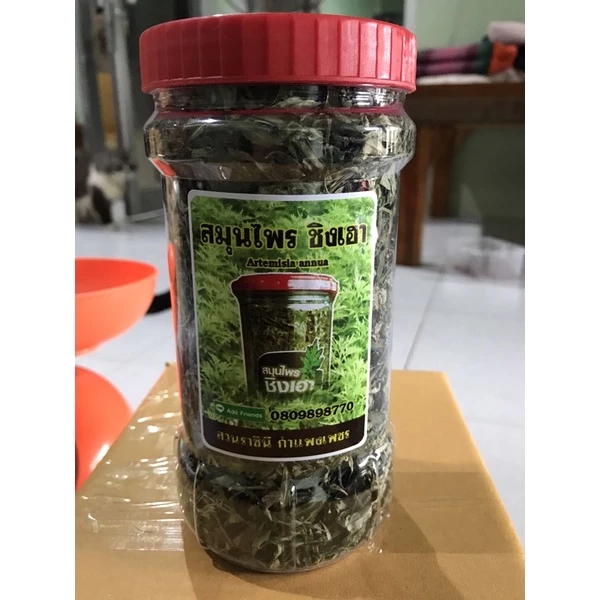
สมุนไพรแพะหงี่แห้ง
หน่อกล้วยตานี
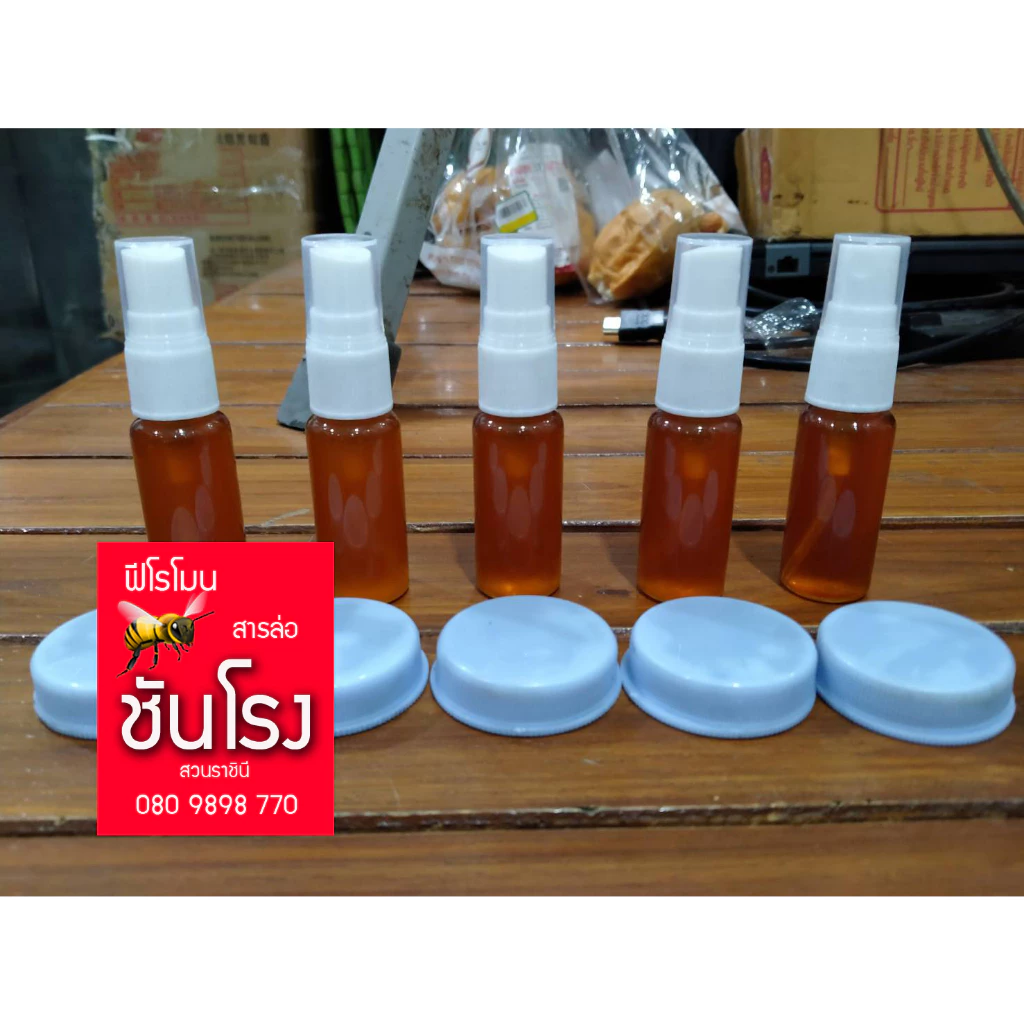
ฟีโรโมนฉีดล่อชันโรง
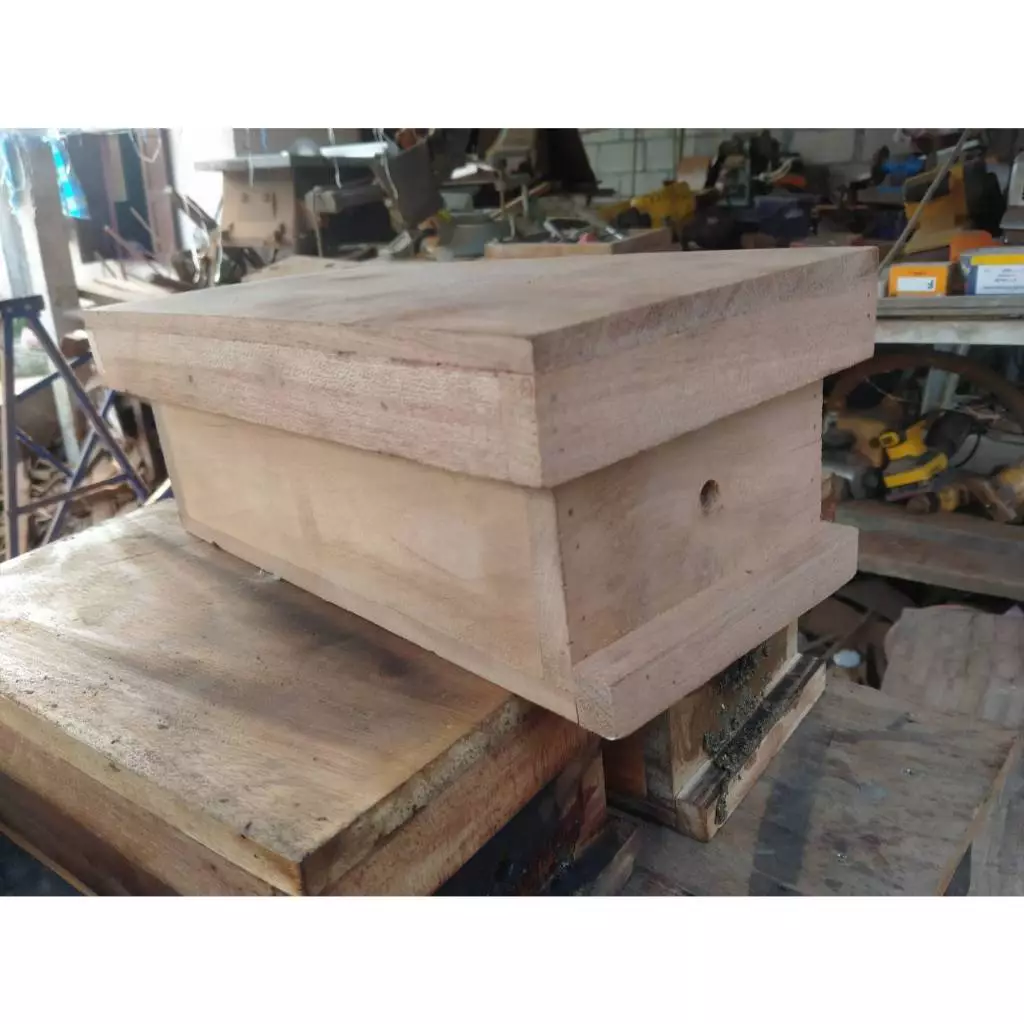
กล่องเลี้ยงชันโรง
กล่องเลี้ยงผึ้งโพรง
หน่อกล้วยพระราชทาน
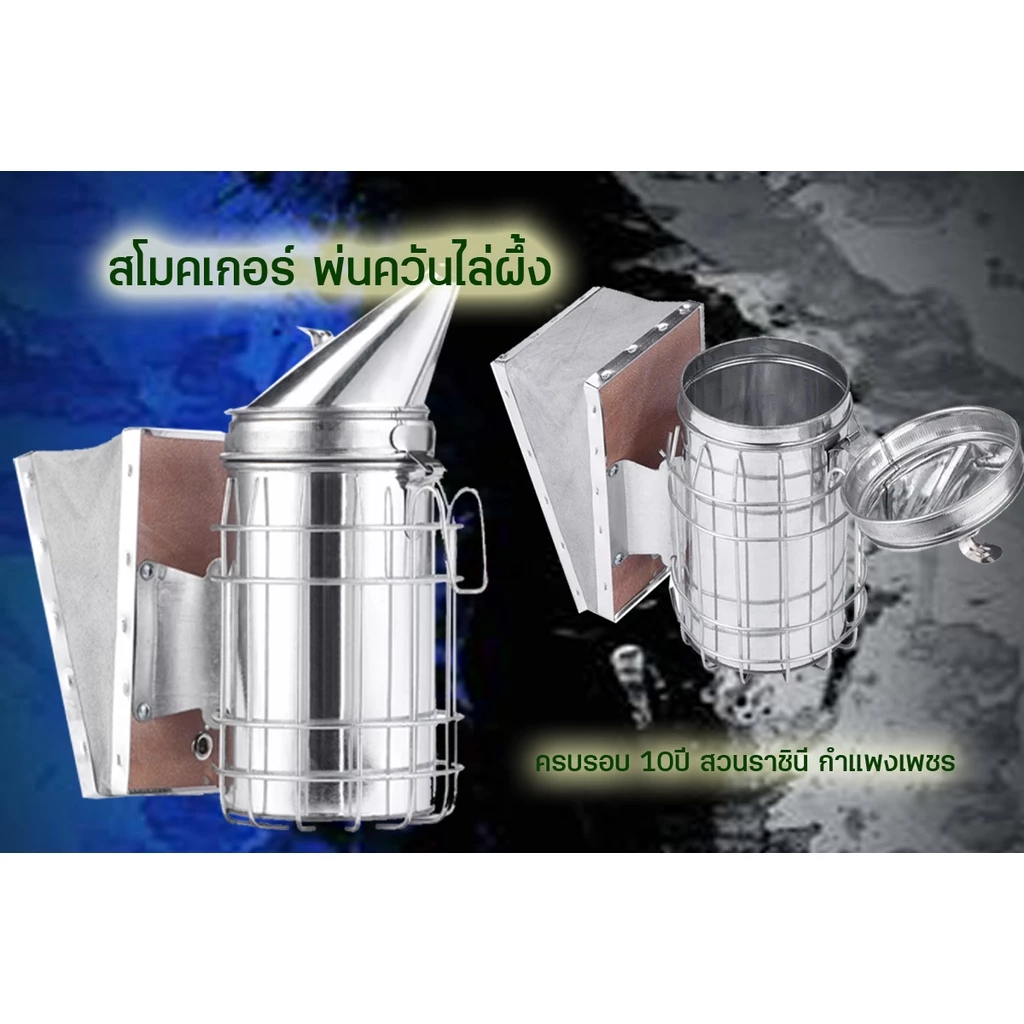
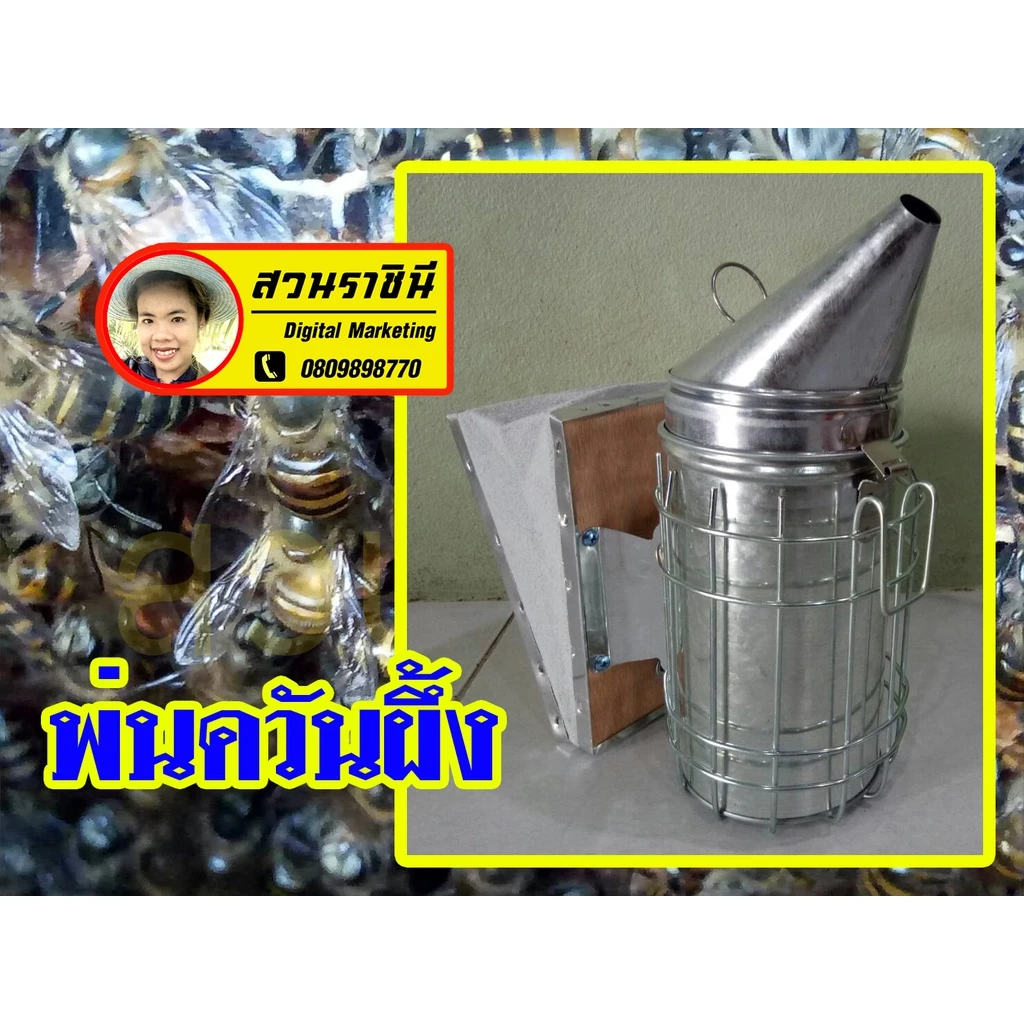
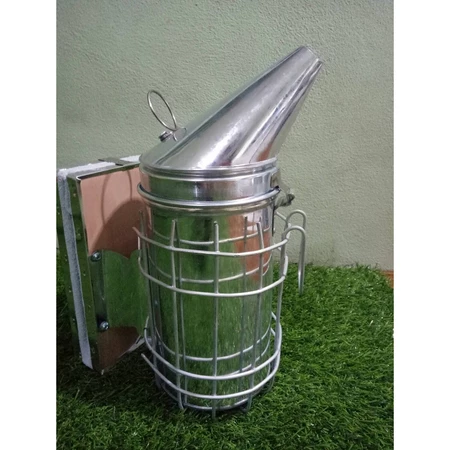
กาพ่นควันผึ้ง สโมคเกอร์
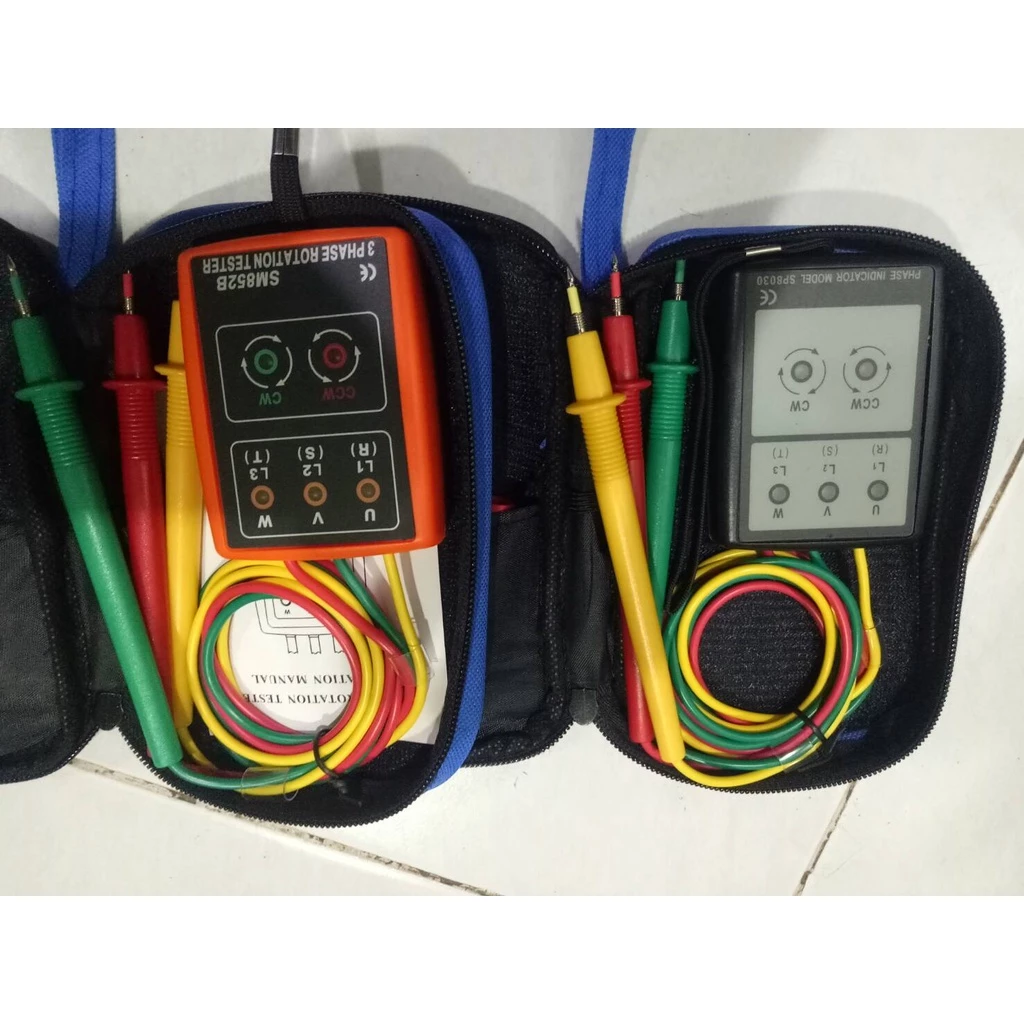
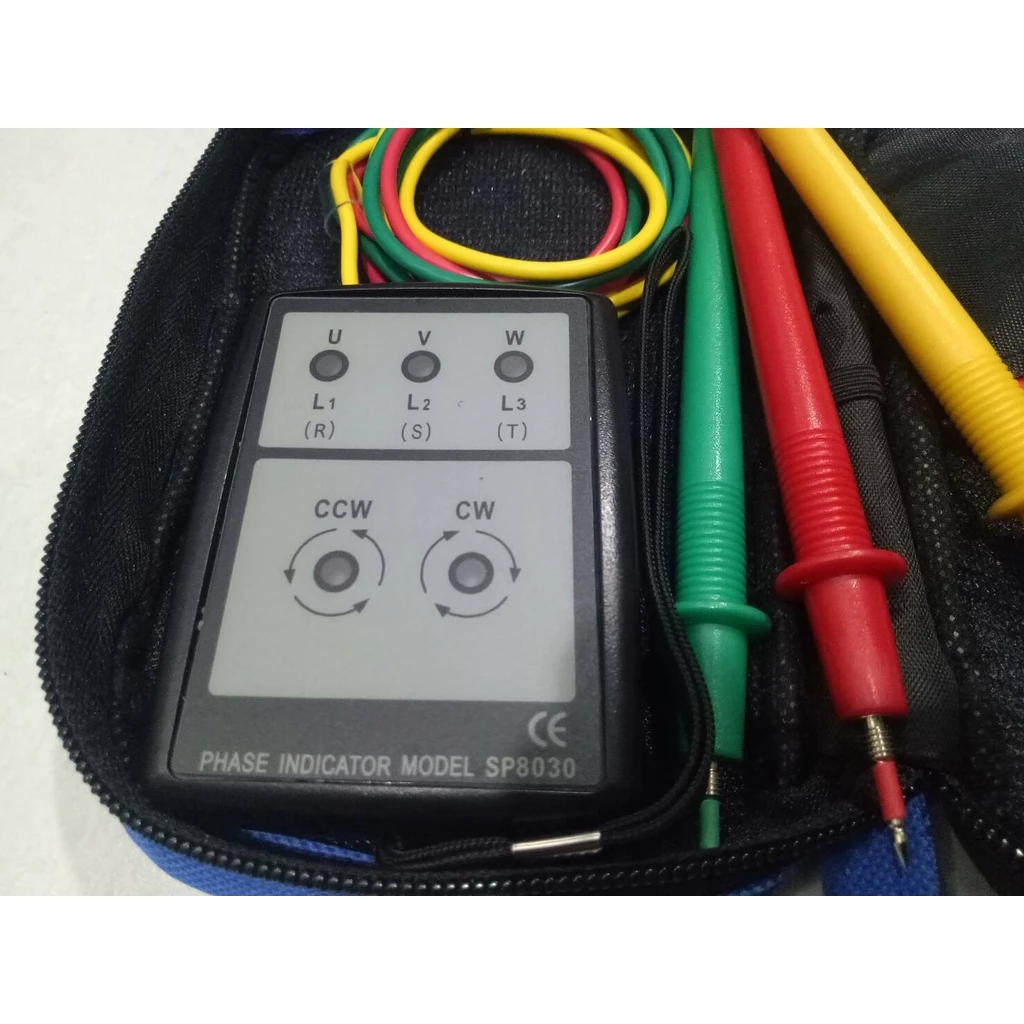
Inverter testerSP8030- SM852B
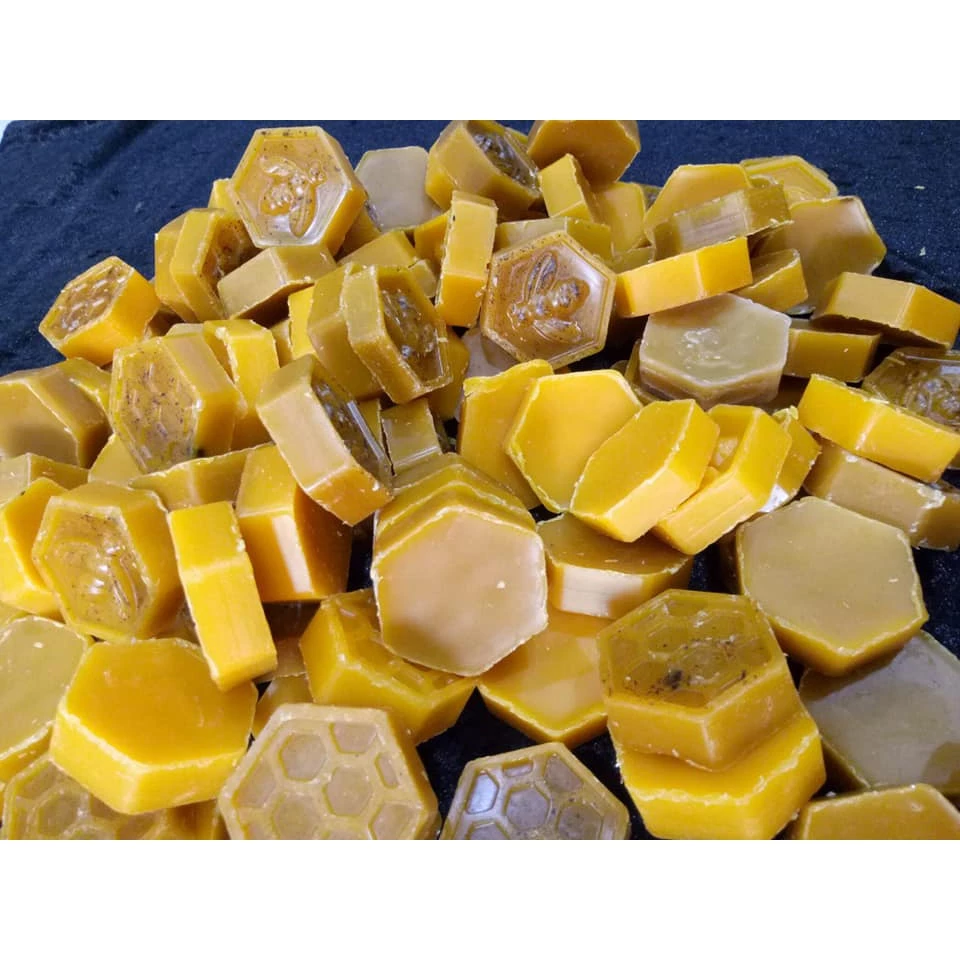
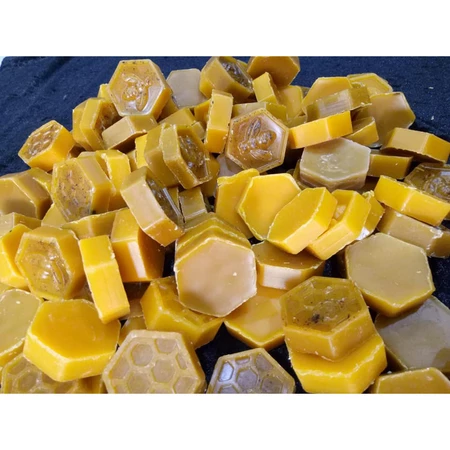
ไขผึ้งสำหรับผึ้งโพรงไทย
ไม้ทับกล้วยปิ้ง14-16
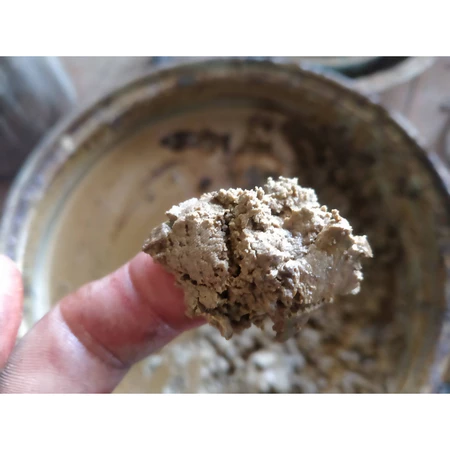
ขี้ชันแท้ 100% สำหรับล่อชันโรง
ฟีโรโมน ฉีดกล่องเลี้ยงชันโรง
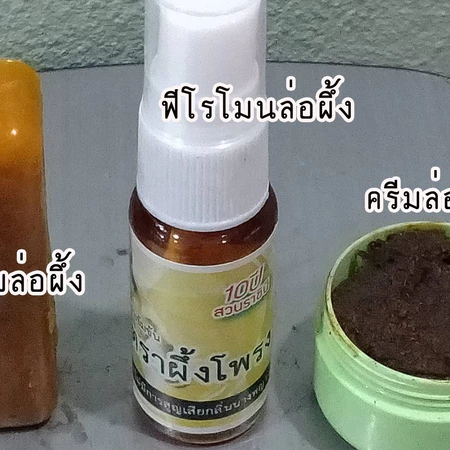
ฟีโรโมนล่อผึ้งโพรง
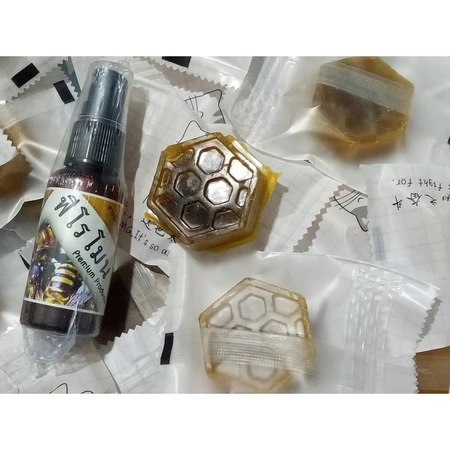
ชุดฟีโรโมนและไขล่อผึ้งโพรงไทย
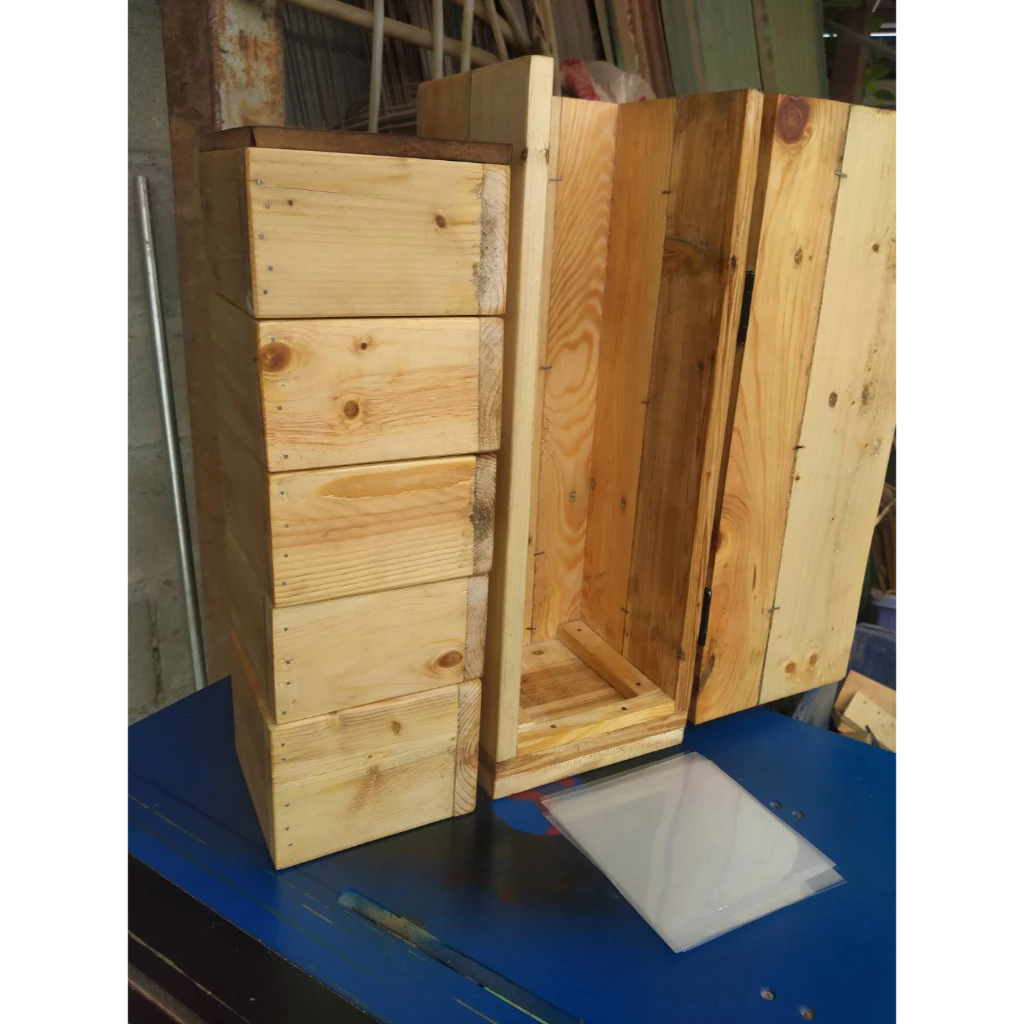
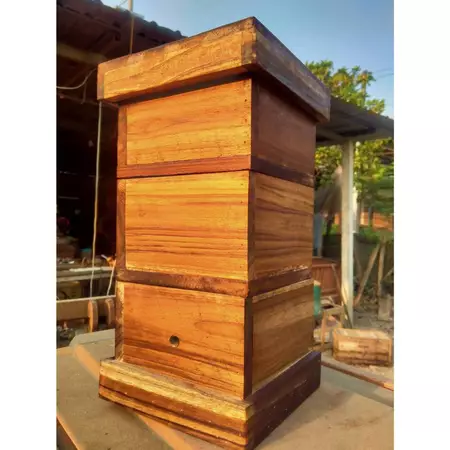
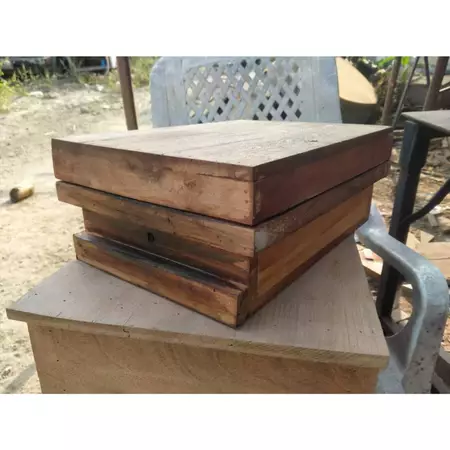
กล่องเลี้ยงชันโรง ขนาด 5 ชั้น แยกรัง
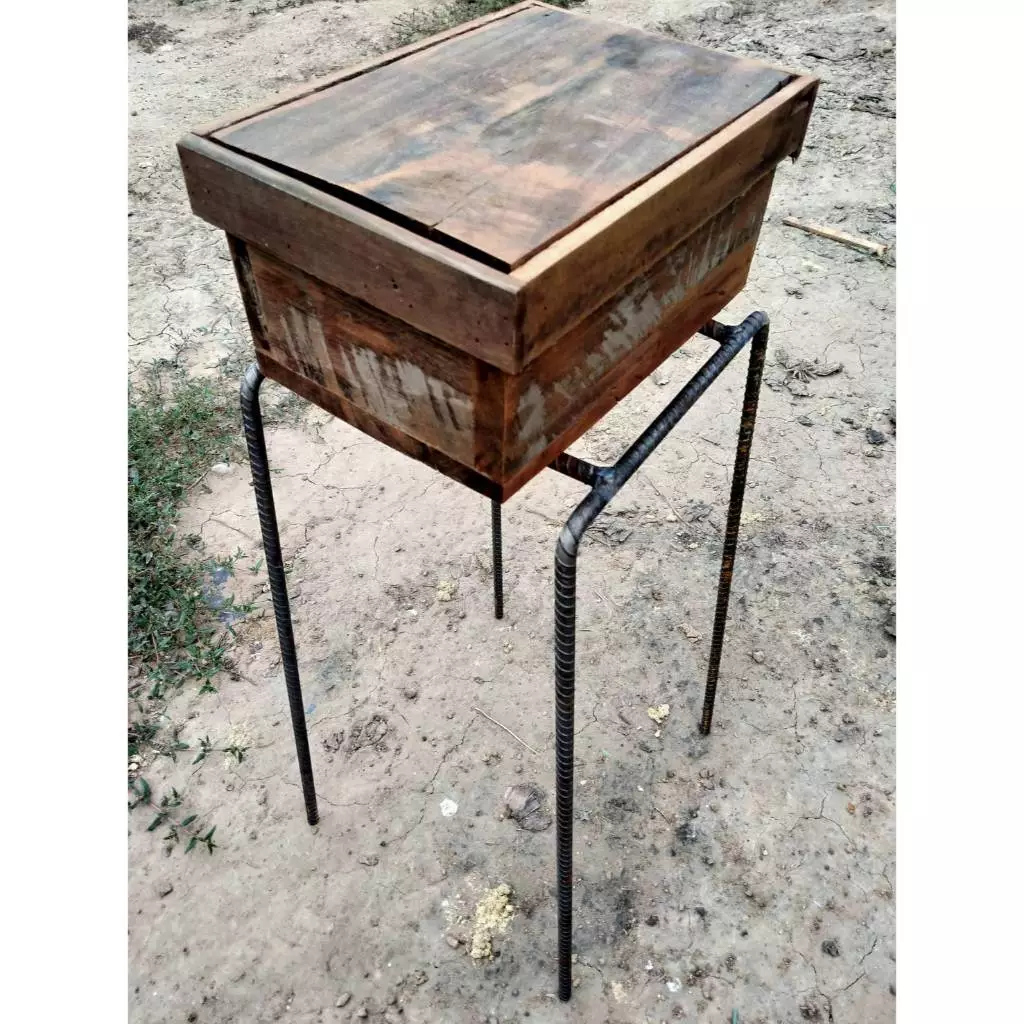
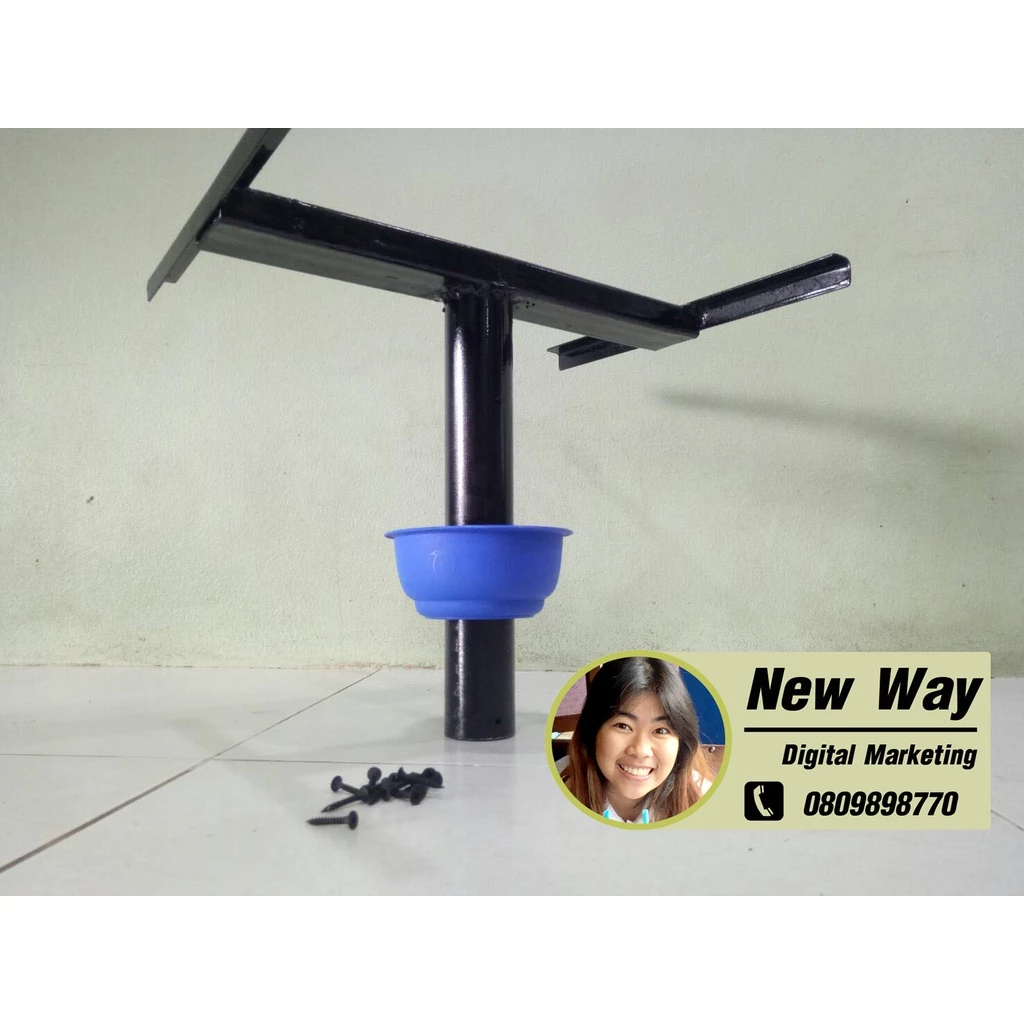
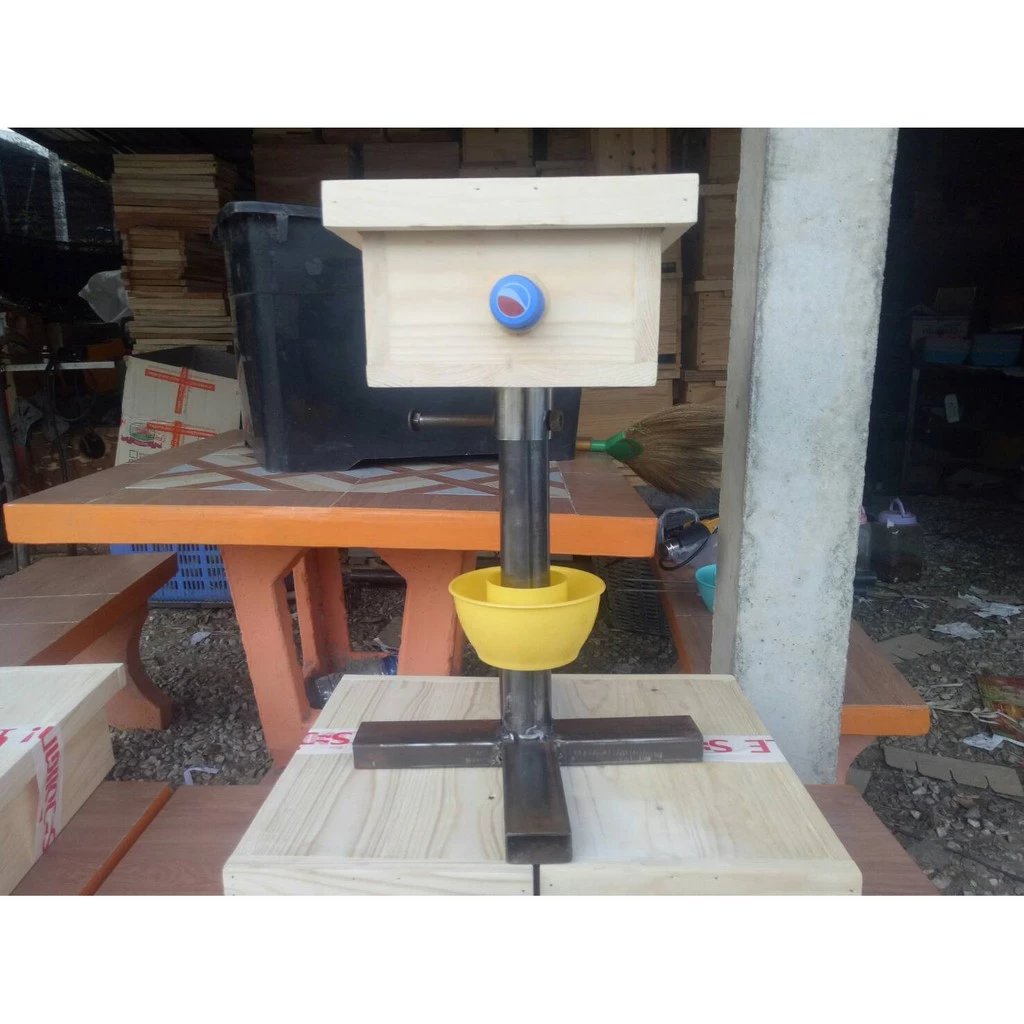
ขาตั้งกล่องเลี้ยงผึ้ง
ขาตั้งกล่องชันโรงไม่มีกล่อง
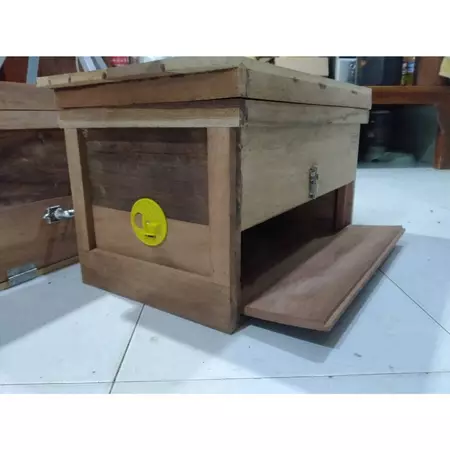
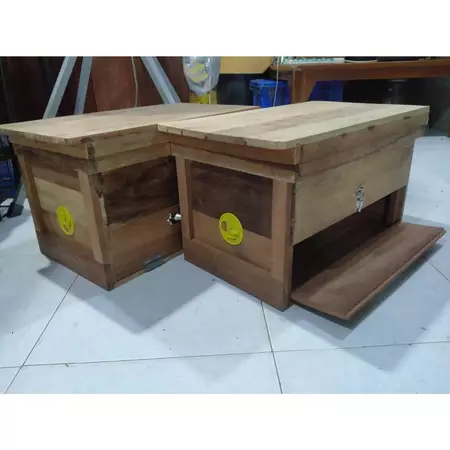
กล่องเลี้ยงชันโรง 2ชั้น
ถาดน้ำหวาน สำหรับเลี้ยง ชันโรง
ไม้ทับกล้วย14-18-28
กล่องเลี้ยงชันโรง เหมาะกับพันธ์ตัวเล็ก
กระต่ายขูดมะพร้าวแบบนั่ง
กล่องเลี้ยงชันโรงแยกน้ำหวานแบบ 2 ชั้น ขนาดA4
ฟีโรโมน ล่อชันโรง สูตรเข้มข้น
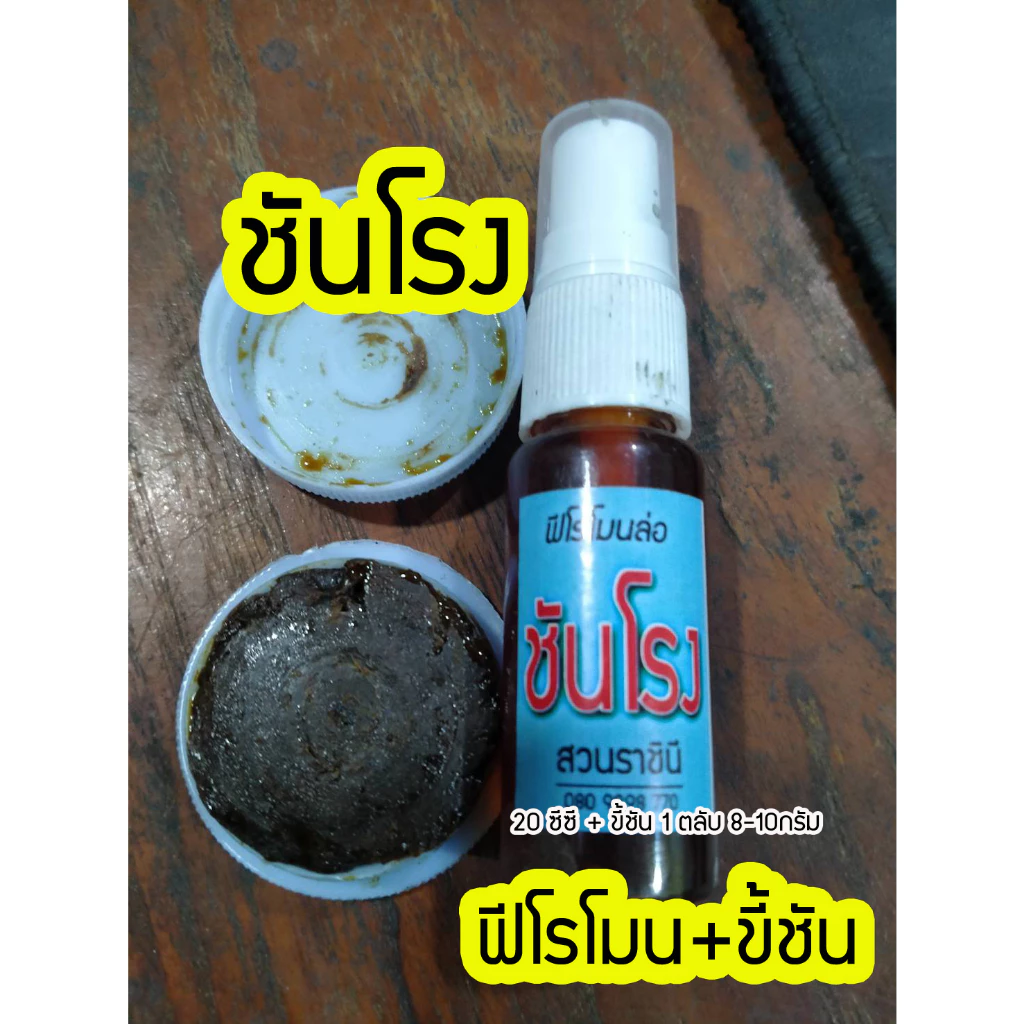
ฟีโรโมนฉีดล่อชันโรง รวมกับขี้ชัน
หน่อกล้วยน้ำว้า ซูปเปอร์ยักษ์
ชุดล่อผึ้งโพรง ฟีโรโมนแบบสกัด+ครีมล่อผึ้ง+ไขล่อผึ้ง
ฟีโรโมนฉีดล่อชันโรงสูตรเข้มข้น
ฟีโรโมน ล่อชันโรง (เกรดพรีเมี่ยม)
ฟีโรโมนฉีดล่อชันโรง
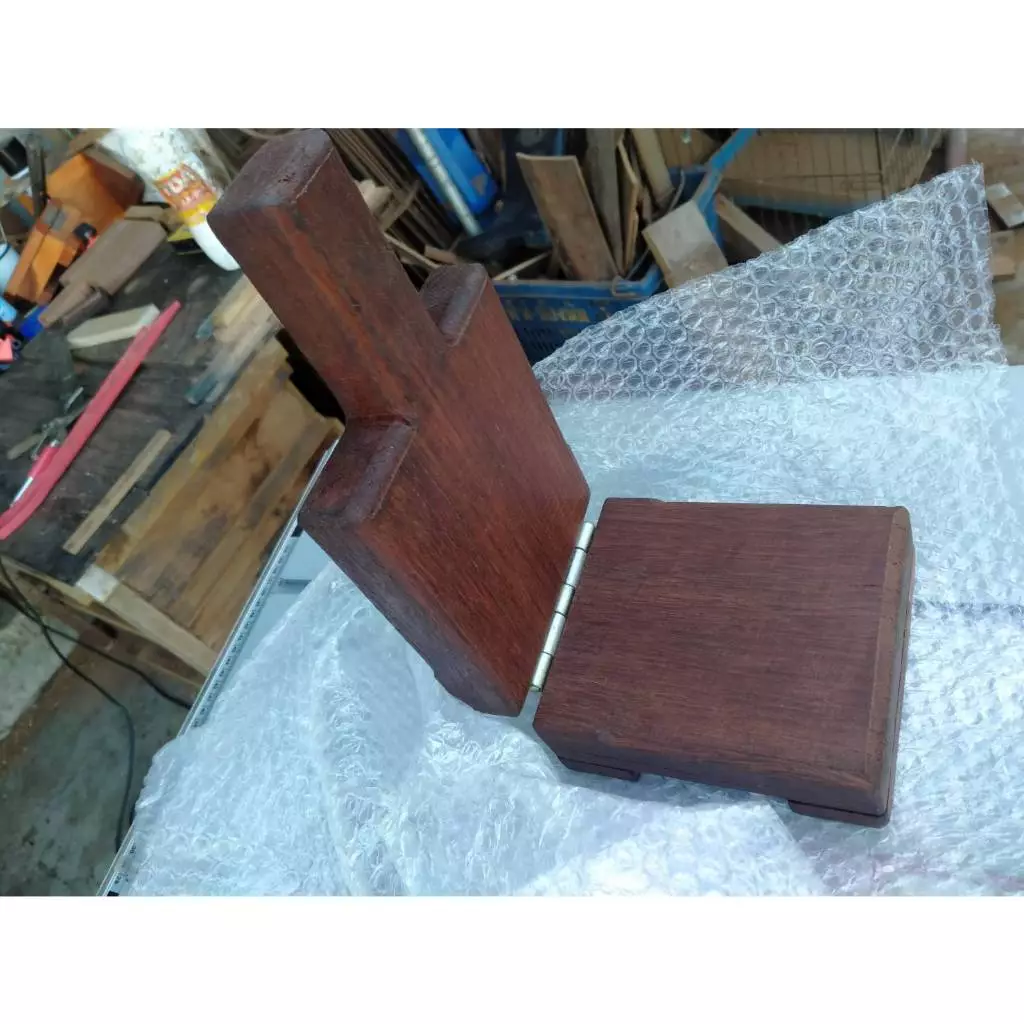
ชิงช้าไม้จากไม้บ้านเก่าอายุ 50 ปี
กล่องเลี้ยงชันโรงแบบ2ชั้น
ฟีโรโมนล่อผึ้งโพรงสูตรหมัก+ไขล่อผึ้งโพรง
สโม๊กเกอร์พ่นควัน
ฟีโรโมนล่อผึ้งโพรง 20 ซีซี+ไขล่อผึ้งโพรงแท้ 1 ก้อน
ไขล่อผึ้งโพรง สูตรเข้มข้น
กล่องเลี้ยงชันโรง แบบ 3 ชั้น
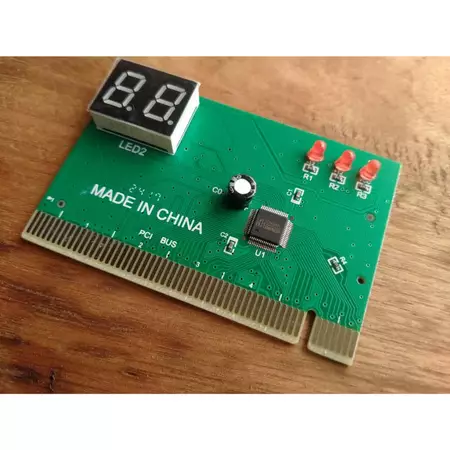
Debug Card (2หลัก) ดีบักการ์ด
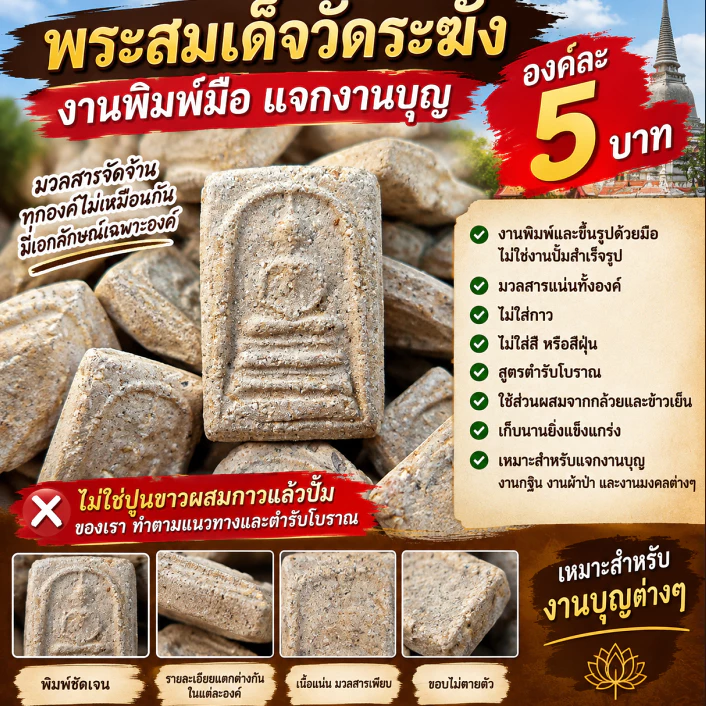
พระสมเด็จวัดระฆัง งานพิมพ์มือ แจกงานบุญ
กล่องเลี้ยงผึ้ง
กล่องชันโรง “สวนราชินี” รุ่น A4 -3 ชั้น
กล่องเลี้ยงชันโรง ขนาด เอ4 สูง 4 นิ้ว

จำนวนการดูหน้าเว็บรวม

วันพฤหัสบดีที่ 19 พฤศจิกายน พ.ศ. 2569

How to Use MiniTool Partition Wizard: Manage Partitions, Resize Drives & Convert MBR to GPT

How to Use MiniTool Partition Wizard: Manage Partitions, Resize Drives & Convert MBR to GPT

MiniTool Partition Wizard is a popular Windows disk and partition management utility with a clear visual disk map and a pending-operations preview. It makes creating, resizing, formatting, and converting drives much more flexible than Windows' built-in disk management tools alone.

Part 1: Key Basics Before You Start
  • Portable Availability & Language: A portable option is available to run without full installation, and the interface uses English menus—making it helpful to know common commands before modifying any disk.
  • Pending Operations Queue: Selecting an action does not immediately alter your drive. Changes are previewed on the disk map and queued in the bottom-left panel until you click Apply (top-left) and confirm.
Important Warning Before Editing Partitions: Resizing, moving, deleting, or converting partitions carries risk if power is lost or an operation is interrupted mid-process. Always back up critical files to another drive or external storage first, and close any programs or open files using the target partition.
Part 2: Common Commands & What They Do
Command / Button Purpose & Usage
Move/Resize Shift a partition's position or shrink/expand its size by dragging handles or entering exact MB/GB values.
Extend Increase a partition's size by pulling space from Unallocated space or adjacent/available space on the same disk.
Format Erase data on a partition and initialize it with a file system such as NTFS, FAT32, or exFAT.
Delete Remove a selected partition and turn its space into Unallocated Space.
Convert MBR to GPT / GPT to MBR Switch a disk's partition table format between MBR and GPT (converting OS/system disks may depend on edition/licensing).
Apply Executes all queued changes on the disk (nothing is written permanently until you click Apply and confirm).
Part 3: Step-by-Step Guide to Common Tasks
Task 1: Shrink or Expand a Partition (Move/Resize)
  1. Select the target partition on the bottom disk map, then click Move/Resize from the left action panel or right-click menu.
  2. Drag the left or right handle (or type a specific size) to shrink or expand the partition, then click OK.
  3. Review the preview on the main screen, click Apply in the top-left corner, and click Yes to confirm.
Task 2: Create a New Partition from Unallocated Space
  1. Select the gray Unallocated space block and choose Create.
  2. Set the partition size, drive letter (such as D:), and file system (typically NTFS), then click OK.
  3. Click Apply in the top-left corner and confirm so the new drive becomes ready to use.
Task 3: Convert an MBR Disk to GPT
  1. Select the physical disk (such as Disk 1), then choose Convert MBR Disk to GPT Disk from the left panel or right-click menu.
  2. Check the queued operation, click Apply in the top-left corner, and click Yes to proceed (if it involves a system disk or requires a reboot, follow the on-screen prompts).
Safety Tip: After clicking Apply, if the program prompts a reboot to complete changes on a system or active drive, let the process run all the way through without powering off or unplugging the PC.

วิธีใช้งาน MiniTool Partition Wizard จัดการพาร์ติชัน ย่อ-ขยายไดรฟ์ และแปลง MBR เป็น GPT

วิธีใช้งาน MiniTool Partition Wizard จัดการพาร์ติชัน ย่อ-ขยายไดรฟ์ และแปลง MBR เป็น GPT

MiniTool Partition Wizard เป็นโปรแกรมจัดการพาร์ติชันและฮาร์ดดิสก์/SSD บน Windows ยอดนิยมที่ใช้งานง่าย มีแถบแสดงผลพาร์ติชันให้ดูชัดเจน และสามารถพรีวิวคำสั่งก่อนกดนำไปใช้จริงได้ ช่วยให้การแบ่งพาร์ติชัน ย่อหรือขยายพื้นที่ไดรฟ์ และการแปลงรูปแบบดิสก์ทำได้สะดวกกว่าเครื่องมือพื้นฐานของ Windows

ส่วนที่ 1 : ข้อควรรู้เบื้องต้นก่อนเริ่มใช้งาน
  • แบบพกพา (Portable) และภาษา: โปรแกรมมีแบบพกพาไม่ต้องติดตั้งลงเครื่อง และมีเมนูภาษาอังกฤษเป็นหลัก จึงควรรู้จักคำสั่งสำคัญๆ ก่อนเริ่มปรับแต่งดิสก์
  • ระบบคิวคำสั่ง (Pending Operations): เวลาคลิกเลือกคำสั่งต่างๆ โปรแกรมจะยังไม่เปลี่ยนโครงสร้างดิสก์ทันที แต่จะแสดงผลตัวอย่างและเก็บรายการไว้ในคิวด้านล่างซ้าย จนกว่าเราจะกดปุ่ม Apply (มุมซ้ายบน) และยืนยันจึงจะทำงานจริง
คำเตือนสำคัญก่อนแก้พาร์ติชัน: การย่อ ขยาย ย้าย หรือแปลงรูปแบบดิสก์มีความเสี่ยงหากไฟดับหรือโปรแกรมถูกตัดกลางคัน ควรสำรองข้อมูลสำคัญไว้ในไดรฟ์อื่นหรือ External Drive ก่อนทุกครั้ง และปิดโปรแกรมที่เปิดไฟล์ค้างไว้บนไดรฟ์เป้าหมาย
ส่วนที่ 2 : คำศัพท์และปุ่มคำสั่งสำคัญที่พบบ่อย
คำสั่งภาษาอังกฤษ ความหมายและการใช้งาน
Move/Resize ย้ายตำแหน่งพาร์ติชัน หรือย่อ/ขยายขนาดพาร์ติชัน (ลากแถบซ้าย-ขวา หรือพิมพ์ตัวเลข MB/GB ได้)
Extend ขยายขนาดพาร์ติชัน โดยดึงพื้นที่ว่าง (Unallocated) หรือพื้นที่ว่างจากพาร์ติชันอื่นบนดิสก์เดียวกันมาเพิ่ม
Format ล้างข้อมูลในพาร์ติชันและตั้งระบบไฟล์ใหม่ (เช่น NTFS, FAT32, exFAT)
Delete ลบพาร์ติชันที่เลือกให้กลายเป็นพื้นที่ว่างที่ยังไม่ได้จัดสรร (Unallocated Space)
Convert MBR to GPT / GPT to MBR แปลงรูปแบบตารางพาร์ติชันของดิสก์ระหว่าง MBR กับ GPT (บางฟีเจอร์ เช่น แปลงดิสก์ระบบ อาจขึ้นอยู่กับรุ่น/ลิขสิทธิ์ของโปรแกรม)
Apply ปุ่มยืนยันเพื่อสั่งให้โปรแกรมเริ่มทำงานตามรายการที่ตั้งค่าไว้ทั้งหมด (ต้องกดปุ่มนี้จึงจะเกิดผลจริง)
ส่วนที่ 3 : ขั้นตอนการใช้งานฟังก์ชันหลักที่เจอบ่อย
วิธีที่ 1 : ย่อหรือขยายขนาดพาร์ติชัน (Move/Resize)
  1. คลิกเลือกพาร์ติชันที่ต้องการปรับขนาดในแผนภาพดิสก์ด้านล่าง แล้วคลิก Move/Resize (ที่แผงเมนูด้านซ้ายหรือคลิกขวาที่พาร์ติชัน)
  2. ลากจุดจับซ้ายหรือขวาเพื่อหดหรือขยายพื้นที่ (หรือกรอกขนาดลงในช่อง) แล้วกด OK
  3. ตรวจสอบตัวอย่างในหน้าหลัก แล้วกดปุ่ม Apply ด้านซ้ายบน และกด Yes เพื่อยืนยันการทำงาน
วิธีที่ 2 : สร้างพาร์ติชันใหม่จากพื้นที่ว่าง (Unallocated)
  1. คลิกเลือกพื้นที่สีเทา/พื้นที่ว่างที่เขียนว่า Unallocated แล้วเลือก Create
  2. กำหนดขนาดพาร์ติชัน ชื่อไดรฟ์ (เช่น D:) และระบบไฟล์ (นิยมใช้ NTFS) แล้วกด OK
  3. กดปุ่ม Apply ด้านซ้ายบนและยืนยันเพื่อให้สร้างไดรฟ์ใช้งานได้จริง
วิธีที่ 3 : แปลงรูปแบบดิสก์ MBR เป็น GPT
  1. คลิกเลือกตัวดิสก์ (เช่น Disk 1) แล้วเลือก Convert MBR Disk to GPT Disk จากเมนูด้านซ้ายหรือคลิกขวาที่ตัวดิสก์
  2. ตรวจสอบรายการในคิวแล้วกดปุ่ม Apply มุมซ้ายบน และกด Yes เพื่อเริ่มแปลง (หากเป็นดิสก์ระบบหรือต้องรีสตาร์ท ให้ทำตามคำแนะนำบนหน้าจอ)
เคล็ดลับความปลอดภัย: หลังกด Apply แล้ว หากเป็นพาร์ติชันระบบหรือดิสก์ที่ Windows ใช้งานอยู่ โปรแกรมอาจแจ้งให้รีสตาร์ทเครื่องเพื่อดำเนินการต่อ ให้ปล่อยให้ทำงานจนเสร็จสมบูรณ์ ห้ามกดปิดสวิตช์หรือดึงสายไฟกลางคันครับ

Partitioning Before Installing Windows 10 & Windows 11: Wipe Entire Drive vs. Wipe Only Drive C:

Partitioning Before Installing Windows 10 & Windows 11: Wipe Entire Drive vs. Wipe Only Drive C:

When you reach the drive selection screen during a Windows 10 or Windows 11 installation, one of the most important decisions is whether to wipe the entire drive (delete all partitions) or wipe only Drive C: (keep other partitions). Choosing the right approach upfront prevents accidental data loss and keeps your disk layout clean and organized.

Part 1: Comparison — Wipe Entire Drive vs. Wipe Only Drive C:
Comparison Point Wipe Entire Drive (Delete All Partitions) Wipe Only Drive C: (Keep Other Partitions)
Impact on Data All data on that physical drive is permanently erased, including D: / E: partitions and legacy system partitions. Data on D: / E: stays intact (however, files stored inside Desktop, Downloads, or Documents on C: will be lost).
Best Used When Installing fresh on a blank/unallocated disk, changing partition style (e.g., MBR to GPT), or reorganizing all partitions from scratch. Reinstalling Windows over an existing system to fix OS issues while keeping important files or backups stored on another partition of the same drive.
System Cleanliness Cleanest possible result with no leftover recovery partitions, hidden system partitions, or dual-boot remnants from prior installations. Clean system installation, though small legacy system or recovery partitions from the previous setup may remain on the disk.
Part 2: Safe Step-by-Step Workflow & Precautions
Data Loss Warning: Before clicking Delete or Format on the Windows Setup drive screen, always double-check drive sizes (GB) and disk numbers—especially on PCs with multiple SSDs or HDDs—so you do not accidentally wipe a drive holding critical files.
  1. Back Up Important Files Before Starting: Move work files, photos, and documents out of Desktop, Documents, and Downloads on Drive C: to another drive or external storage device.
  2. Choose Your Approach on the Drive Screen (Where do you want to install Windows?):
    • Wipe Only Drive C:: Select only the main partition for Drive C: (identified by its size), click Delete or Format, select that space, and click Next.
    • Wipe Entire Drive: Select each partition on the target drive one by one and click Delete until it becomes a single block of Unallocated Space, then click Next (or click New first to divide space into custom partitions).
  3. Manage Remaining Disk Space After Installation: If you wiped the entire drive and left unallocated space for a data drive, once you reach the Desktop, right-click the Start button, open Disk Management, and create a new volume assigned to a drive letter such as D:.
Part 3: Recommended Partition Sizing for Modern Windows
How Much Space Should You Allocate to Drive C:? For Windows 10 and Windows 11, aim for at least 120GB – 250GB on Drive C: (around 200–300GB is comfortable on a 500GB–1TB SSD), since system updates, caches, and modern apps take noticeably more space than in older versions. Allocate the remaining space to your data partition (D:).

การแบ่งพาร์ติชันก่อนลง Windows 10 และ Windows 11 : ล้างทั้งลูก vs ล้างแค่ไดรฟ์ C:

การแบ่งพาร์ติชันก่อนลง Windows 10 และ Windows 11 : ล้างทั้งลูก vs ล้างแค่ไดรฟ์ C:

เมื่อเข้าสู่หน้าเลือกพื้นที่ติดตั้งของ Windows 10 หรือ Windows 11 คำถามสำคัญที่หลายคนต้องตัดสินใจคือจะ ล้างทั้งลูก (ลบทุกพาร์ติชันในดิสก์) หรือ ล้างแค่ไดรฟ์ C: (เก็บไดรฟ์อื่นไว้) การเลือกให้ถูกต้องตั้งแต่ต้นจะช่วยป้องกันข้อมูลสูญหายและทำให้ระบบทำงานได้สะอาดเรียบร้อยครับ

ส่วนที่ 1 : ตารางเปรียบเทียบ ล้างทั้งลูก กับ ล้างแค่ไดรฟ์ C:
หัวข้อเปรียบเทียบ ล้างทั้งลูก (ลบทุกพาร์ติชันในดิสก์) ล้างแค่ไดรฟ์ C: (เก็บไดรฟ์อื่นไว้)
ผลกระทบต่อข้อมูล ข้อมูลทั้งหมดในดิสก์ลูกนั้นจะหายเกลี้ยง รวมถึงไดรฟ์ D: / E: และพาร์ติชันระบบเก่า ข้อมูลในไดรฟ์ D: / E: ยังอยู่เหมือนเดิม (แต่ไฟล์ใน Desktop, Downloads, Documents บนไดรฟ์ C: จะหาย)
เหมาะกับสถานการณ์ใด ลง Windows ใหม่บนดิสก์เปล่า, เปลี่ยนโครงสร้างดิสก์ (เช่น MBR เป็น GPT), หรือจัดระเบียบพาร์ติชันใหม่ทั้งหมด ต้องการลง Windows ทับตัวเก่าเพื่อแก้ระบบ แต่ยังมีไฟล์งานหรือข้อมูลสำคัญอยู่ในไดรฟ์สำรองของลูกเดียวกัน
ความสะอาดของระบบ สะอาดที่สุด ไม่มีพาร์ติชันสำรอง/Recovery เก่า หรือไฟล์บูตค้างจากระบบเดิม สะอาดในระดับที่ดี แต่บางครั้งอาจยังมีพาร์ติชันระบบเล็กๆ ของตัวเก่าติดอยู่บ้าง
ส่วนที่ 2 : ขั้นตอนปฏิบัติและข้อควรระวังอย่างปลอดภัย
คำเตือนเรื่องข้อมูลสูญหาย: ก่อนกด Delete หรือ Format ในหน้าเลือกไดรฟ์ของ Windows Setup ให้ดูขนาดความจุ (GB) และลำดับดิสก์ให้ชัดเจนทุกครั้ง โดยเฉพาะเครื่องที่มี SSD/HDD หลายลูก เพื่อป้องกันการเผลอลบไดรฟ์ที่มีข้อมูลสำคัญ
  1. สำรองข้อมูลสำคัญก่อนเริ่มลง Windows: ย้ายไฟล์งาน รูปภาพ หรือเอกสารที่อยู่ในโฟลเดอร์ Desktop, Documents และ Downloads ออกจากไดรฟ์ C: ไปไว้ที่ไดรฟ์อื่นหรือ External Drive ให้เรียบร้อย
  2. เลือกแนวทางในหน้าติดตั้ง (Where do you want to install Windows?):
    • กรณีล้างแค่ไดรฟ์ C: เลือกเฉพาะพาร์ติชันหลักของไดรฟ์ C: (สังเกตจากขนาดความจุที่ตั้งไว้) แล้วกด Delete หรือ Format จากนั้นคลิกเลือกพื้นที่นั้นแล้วกด Next
    • กรณีล้างทั้งลูก: เลือกพาร์ติชันทั้งหมดในดิสก์เป้าหมายทีละรายการแล้วกด Delete จนรวมเป็นพื้นที่ว่างก้อนเดียว (Unallocated Space) จากนั้นกด Next (หรือกด New เพื่อแบ่งสัดส่วนพาร์ติชันตามต้องการก่อน)
  3. จัดการไดรฟ์ที่เหลือหลังลง Windows เสร็จ: หากล้างทั้งลูกแล้วยังไม่ได้สร้างหรือกำหนดอักษรไดรฟ์ให้พื้นที่ว่างส่วนที่เหลือ เมื่อเข้าหน้า Desktop แล้วให้คลิกขวาที่ปุ่ม Start เลือก Disk Management เพื่อสร้างพาร์ติชันและกำหนดอักษรไดรฟ์ (เช่น D:) ได้ทันที
ส่วนที่ 3 : คำแนะนำการแบ่งสัดส่วนพื้นที่ไดรฟ์ C: สมัยนี้
ควรเผื่อพื้นที่ไดรฟ์ C: เท่าไหร่ดี: สำหรับ Windows 10 และ Windows 11 แนะนำให้เผื่อพื้นที่ไดรฟ์ C: อย่างน้อย 120GB – 250GB (หากใช้ SSD ความจุ 500GB–1TB สามารถเผื่อไว้ราว 200–300GB ได้สบาย) เนื่องจากไฟล์อัปเดตระบบ แคช และโปรแกรมสมัยใหม่ใช้พื้นที่มากกว่าในอดีต ส่วนพื้นที่ที่เหลือจึงค่อยจัดสรรเป็นไดรฟ์เก็บข้อมูล (D:) ครับ

7 สิ่งที่ต้องตั้งค่าหลังลง Windows 10 และ Windows 11 เสร็จใหม่ๆ ให้พร้อมใช้งานและลื่นไหล

7 สิ่งที่ต้องตั้งค่าหลังลง Windows 10 และ Windows 11 เสร็จใหม่ๆ ให้พร้อมใช้งานและลื่นไหล

หลังจากติดตั้ง Windows 10 หรือ Windows 11 เสร็จจนเข้าสู่หน้า Desktop ได้แล้ว ระบบยังเป็นเพียงค่าเริ่มต้นพื้นฐานเท่านั้น การไล่ตั้งค่าและติดตั้งองค์ประกอบสำคัญตาม 7 ขั้นตอนนี้ จะช่วยให้คอมพิวเตอร์ทำงานได้เต็มประสิทธิภาพ ปลอดภัย และพร้อมใช้งานประจำวันได้อย่างราบรื่นครับ

1. เชื่อมต่ออินเทอร์เน็ตและรัน Windows Update (สำคัญที่สุด)
  • เข้าไปที่ Settings > Windows Update แล้วกดปุ่ม Check for updates
  • ปล่อยให้ระบบดาวน์โหลดและติดตั้งแพตช์ความปลอดภัย รวมถึงไดรเวอร์พื้นฐาน (Chipset, เสียง, LAN/Wi-Fi, การ์ดจอ) ให้ครบถ้วน จากนั้นกด Restart เครื่องตามที่ระบบแจ้งจนกว่าสถานะจะขึ้นว่า You're up to date
2. ลงไดรเวอร์เฉพาะทางให้ครบ (ตรวจสอบใน Device Manager)
  • คลิกขวาที่ปุ่ม Start เลือก Device Manager เพื่อตรวจสอบว่ามีอุปกรณ์ใดขึ้นเครื่องหมายตกใจสีเหลือง (!) หรือขึ้นเป็น Unknown device หรือไม่
  • ไดรเวอร์ที่ควรดาวน์โหลดลงเองจากเว็บไซต์ผู้ผลิต:
    • การ์ดจอ (NVIDIA / AMD / Intel): ติดตั้งไดรเวอร์เวอร์ชันล่าสุดโดยตรงเพื่อให้การแสดงผลภาพ วิดีโอ และเกมทำงานได้เต็มประสิทธิภาพ
    • Chipset / Touchpad / Audio: หาก Windows Update ยังดึงมาไม่ครบ สามารถดาวน์โหลดได้จากหน้า Support ของเมนบอร์ดหรือโน้ตบุ๊กรุ่นนั้นๆ
3. ตั้งค่าภาษาและคีย์บอร์ดไทย (สลับภาษาด้วยปุ่มตัวหนอน ~)
  • เพิ่มภาษาไทย: เข้า Settings > Time & language > Language & region กด Add a language ค้นหาคำว่า Thai แล้วกดติดตั้ง
  • ตั้งปุ่มสลับภาษา (~ Grave Accent):
    1. ไปที่ Settings > Time & language > Typing > Advanced keyboard settings
    2. คลิกเลือก Input language hot keys
    3. กดปุ่ม Change Key Sequence... เลือกฝั่งซ้ายเป็น Grave Accent (`) แล้วกด OK และ Apply
4. ตั้งค่าการแสดงผลและดึงไอคอนหน้าจอ Desktop
  • ปรับความละเอียดและรีเฟรชเรต: คลิกขวาที่พื้นที่ว่างบนหน้าจอเลือก Display settings ตรวจสอบให้ Display resolution เป็นค่าสูงสุด (Recommended) และเข้าไปที่ Advanced display เพื่อปรับ Refresh rate (Hz) ให้สูงสุดตามสเปกหน้าจอ
  • ดึงไอคอน This PC กลับมาหน้าจอ: เข้า Settings > Personalization > Themes > Desktop icon settings ติ๊กถูกที่ Computer (รวมถึง User's Files หรือ Network ตามต้องการ) แล้วกด OK
5. ปิดแอปทำงานเบื้องหลังและปรับโหมดพลังงาน
  • ปิดโปรแกรมเปิดเองตอนเปิดเครื่อง (Startup Apps): กดปุ่ม Ctrl + Shift + Esc เพื่อเปิด Task Manager ไปที่แท็บ Startup apps คลิกขวาเลือก Disable โปรแกรมที่ไม่จำเป็นต้องรันทันทีตอนเปิดเครื่อง (เช่น OneDrive, Microsoft Teams หรือแอปแชตต่างๆ)
  • ปิดโฆษณาและคำแนะนำในระบบ: เข้า Settings > Privacy & security > General ปิดสวิตช์ตัวเลือกแนะนำเนื้อหาและโฆษณาที่ไม่ได้ใช้งาน
  • เลือกโหมดพลังงาน (Power Mode): เข้า Settings > System > Power & battery เลือกเป็น Balanced สำหรับใช้งานทั่วไป หรือ Best performance สำหรับงานประมวลผลหนักและเล่นเกม
6. ติดตั้งชุดคำสั่งเสริม (Runtime) และโปรแกรมพื้นฐาน
  • ชุดคำสั่งพื้นฐานที่ควรมีติดเครื่อง: ติดตั้ง Microsoft Visual C++ Redistributable (ชุดรวม All-in-One) และ .NET Desktop Runtime เพื่อป้องกันปัญหาเปิดโปรแกรมหรือเกมไม่ได้แล้วฟ้องขาดไฟล์ .dll
  • โปรแกรมใช้งานประจำวัน: ติดตั้งเว็บเบราว์เซอร์ (Chrome / Edge), โปรแกรมบีบอัดไฟล์ (WinRAR / 7-Zip), โปรแกรมเล่นวิดีโอและเพลง (VLC), โปรแกรมอ่านไฟล์ PDF และชุดโปรแกรมเอกสาร
7. ตรวจสอบความปลอดภัยและสร้างจุดกู้คืนระบบ (System Restore)
  • เช็กระบบป้องกันไวรัส: เปิดโปรแกรม Windows Security ตรวจสอบให้ Virus & threat protection และ Firewall & network protection แสดงเครื่องหมายถูกสีเขียวทำงานตามปกติ
  • เปิดใช้งาน System Restore: พิมพ์ค้นหา Create a restore point ในช่องค้นหา เลือกไดรฟ์ C: กดปุ่ม Configure เลือก Turn on system protection แล้วกดปุ่ม Create เพื่อบันทึกจุดย้อนกลับในขณะที่ระบบยังสะอาดและสมบูรณ์ที่สุดเก็บไว้ใช้งานยามฉุกเฉิน
สรุปลำดับที่แนะนำ: ควรอัปเดต Windows Update และลงไดรเวอร์ให้เรียบร้อยก่อนเป็นอันดับแรก จากนั้นจึงค่อยตั้งค่าภาษา ปิด Startup Apps และทยอยลงโปรแกรมใช้งานทั่วไปครับ

7 Essential Things to Set Up After Clean Installing Windows 10 & Windows 11

7 Essential Things to Set Up After Clean Installing Windows 10 & Windows 11

Once you finish installing Windows 10 or Windows 11 and reach the Desktop, the operating system is still running on default baseline settings. Walking through these 7 essential post-install steps ensures your PC runs smoothly, securely, and at full hardware performance.

1. Connect to the Internet and Run Windows Update (Top Priority)
  • Open Settings > Windows Update and click Check for updates.
  • Allow Windows to download and install all cumulative security patches along with baseline drivers (Chipset, Audio, LAN/Wi-Fi, Display). Restart your PC whenever prompted until the status reads You're up to date.
2. Install Official Hardware Drivers (Verify in Device Manager)
  • Right-click the Start button and select Device Manager to check for any devices showing a yellow exclamation mark (!) or listed as Unknown device.
  • Key drivers to download directly from the manufacturer:
    • Graphics Drivers (NVIDIA / AMD / Intel): Install the latest official GPU driver for smooth video playback, display scaling, and gaming performance.
    • Chipset / Touchpad / Audio: If Windows Update missed any motherboard or laptop-specific controllers, download them from your manufacturer's official support page.
3. Configure Regional Languages and Keyboard Shortcuts
  • Add Additional Languages: Go to Settings > Time & language > Language & region, click Add a language, search for your preferred language, and install its pack.
  • Customize Input Switching Hotkeys:
    1. Navigate to Settings > Time & language > Typing > Advanced keyboard settings.
    2. Click Input language hot keys.
    3. Select Change Key Sequence... to assign your preferred shortcut (such as Grave Accent (`) or Alt + Shift), then click OK and Apply.
4. Adjust Display Scaling, Refresh Rate, and Desktop Icons
  • Set Resolution and Refresh Rate: Right-click on the Desktop and choose Display settings. Confirm Display resolution is set to the native recommended value, then open Advanced display to select the highest supported Refresh rate (Hz).
  • Restore Classic Desktop Icons: Go to Settings > Personalization > Themes > Desktop icon settings, check Computer (This PC) along with User's Files or Network as desired, and click OK.
5. Disable Unnecessary Startup Apps and Tune Power Settings
  • Trim Startup Programs: Press Ctrl + Shift + Esc to open Task Manager, switch to the Startup apps tab, and right-click Disable on apps you do not need launching automatically at boot (such as OneDrive, Microsoft Teams, or chat clients).
  • Turn Off System Suggestions & Ads: Open Settings > Privacy & security > General and toggle off unwanted advertising ID and suggested content options.
  • Select Your Power Mode: Go to Settings > System > Power & battery and choose Balanced for everyday efficiency or Best performance for heavy workloads and gaming.
6. Install Core Runtime Libraries and Everyday Software
  • Essential System Runtimes: Install the Microsoft Visual C++ Redistributable (All-in-One package) and .NET Desktop Runtime so older software and games launch without missing .dll errors.
  • Daily Productivity Apps: Install your preferred web browser (Chrome / Edge), file archiver (7-Zip / WinRAR), media player (VLC), PDF reader, and office suite.
7. Verify Windows Security and Create a System Restore Point
  • Check Security Status: Open Windows Security and confirm that Virus & threat protection and Firewall & network protection show green checkmarks.
  • Enable System Restore: Search for Create a restore point in the Start menu, select your C: drive, click Configure, select Turn on system protection, and click Create to save a clean baseline snapshot for future recovery.
Recommended Order of Operations: Always complete Windows Updates and install core hardware drivers first before customizing appearance settings, disabling startup programs, or installing third-party applications.

Common Windows 10 & Windows 11 Installation and Post-Install Issues (And How to Fix Them)

Common Windows 10 & Windows 11 Installation and Post-Install Issues (And How to Fix Them)

When installing Windows 10 or Windows 11 from scratch, it is common to encounter roadblocks either during the setup wizard or right after reaching the Desktop when essential hardware refuses to work. This guide walks through the most frequent causes and step-by-step solutions for each issue.

Part 1: Common Issues During Windows Installation
1. SSD or NVMe Drive Not Showing Up on the Disk Selection Screen
  • Cause: Newer Intel-based PCs and laptops often ship with Intel VMD / Intel RST enabled in BIOS, preventing the standard Windows installer from detecting the storage controller—or the drive uses an MBR partition table while booting in UEFI mode.
  • How to Fix: Download the storage driver (IRST / VMD) for your motherboard or laptop model, extract it onto your USB installer, and click Load Driver on the drive selection screen. Alternatively, if performing a clean wipe, convert the disk partition style to GPT (note: this erases all data on the drive).
2. Blocked by Windows 11 Hardware Requirements (TPM 2.0 / Secure Boot / CPU)
  • Cause: Older hardware does not meet Microsoft's minimum system requirements, or required security features are currently disabled in BIOS.
  • How to Fix: Enter BIOS and enable TPM (fTPM / PTT) and Secure Boot if your hardware supports them. For older unsupported PCs, recreate your bootable USB using Rufus and check the option to bypass hardware requirement checks.
3. Setup Freezes or Loops Back to the Beginning After Rebooting
  • Cause: A corrupted .iso image, unstable USB transfer, or the BIOS boot order is still set to prioritize the USB drive over the internal SSD after the first reboot.
  • How to Fix: Once Windows finishes copying files and restarts for the first time, if it loops back to the initial setup screen, unplug the USB Flash Drive or set Windows Boot Manager / your internal SSD as the first boot device in BIOS.
4. Forced Internet Connection and Microsoft Account Sign-In Screen
  • Cause: Newer builds of Windows 10/11 require an active internet connection and a Microsoft Account during the Out-of-Box Experience (OOBE) before letting you reach the Desktop.
  • How to Fix: You can check the bypass option when creating the USB in Rufus. If you are already on the setup screen, press Shift + F10 to open Command Prompt, type OOBE\BYPASSNRO, and press Enter. The PC will reboot and reveal the "I don't have internet" offline setup option.
Part 2: Hardware & Software Issues After Installation (Post-Install)
1. No Sound / Audio Not Playing Through Speakers or Headphones
  • Cause: Windows is using a generic audio driver, or audio output has defaulted to an external monitor via HDMI/DisplayPort instead of your speakers.
  • How to Fix: Click the speaker icon in the bottom-right taskbar to switch Sound output to the correct playback device. Next, connect to the internet and run Windows Update, or install the official audio driver (such as Realtek) from your motherboard or laptop manufacturer.
2. Cannot Connect to Wi-Fi or Ethernet / No Networks Detected
  • Cause: Missing network adapter drivers, especially on newer Wi-Fi 6/6E/7 or 2.5GbE LAN chips not included in the base Windows image.
  • How to Fix: Connect your smartphone to the PC via a USB cable and enable USB Tethering to temporarily share mobile internet so Windows Update can download the network drivers—or download the Wi-Fi/LAN drivers on another PC and transfer them via USB.
3. Stretched Screen Resolution or Locked Refresh Rate
  • Cause: Windows is running on the fallback Microsoft Basic Display Adapter because dedicated or integrated graphics drivers have not been installed yet.
  • How to Fix: Download and install the latest graphics driver for your GPU/CPU (Intel, AMD, or NVIDIA) directly from the manufacturer's website, then adjust your resolution and refresh rate under Settings > System > Display.
4. Some USB Ports Not Working or Laptop Touchpad Unresponsive
  • Cause: Missing motherboard Chipset Drivers or manufacturer-specific Serial IO / Touchpad Drivers.
  • How to Fix: Install the Chipset Driver for your motherboard or laptop first, followed by the Touchpad driver from the manufacturer's official support page.
5. PC Boots Directly Into BIOS or Freezes on the Logo Screen After Setup
  • Cause: Boot priority is still pointing to a removed device, or the BIOS boot mode (UEFI vs. Legacy) does not match how Windows was installed.
  • How to Fix: Make sure the installation USB drive is unplugged, enter BIOS, navigate to the Boot tab, and set Windows Boot Manager (or the drive containing Windows) as Boot Option #1, then press F10 to save and exit.
6. Apps Fail to Launch or Show Missing System File Errors
  • Cause: A fresh Windows installation lacks legacy or third-party runtime libraries required by certain applications, such as Visual C++ or .NET Framework.
  • How to Fix: Complete all pending Windows Updates and install the essential runtime packages: Microsoft Visual C++ Redistributable and .NET Framework.
Pro Tip Right After Clean Installing Windows: As soon as you reach the Desktop and get online, go to Settings > Windows Update and click Check for updates. Let Windows automatically pull down core chipset, display, audio, and network drivers along with security patches before installing your everyday software.

รวมปัญหาที่พบบ่อยระหว่างการลง Windows และหลังลงเสร็จแล้วใช้งานไม่ได้ พร้อมวิธีแก้ไข

รวมปัญหาที่พบบ่อยระหว่างการลง Windows และหลังลงเสร็จแล้วใช้งานไม่ได้ พร้อมวิธีแก้ไข

ในการติดตั้ง Windows 10 หรือ Windows 11 ด้วยตัวเอง หลายคนมักพบอาการติดขัดทั้งในระหว่างขั้นตอนการติดตั้ง และหลังจากลงเสร็จเข้าหน้า Desktop แล้วแต่อุปกรณ์บางอย่างใช้งานไม่ได้ตามปกติ บทความนี้ได้รวบรวมสาเหตุและวิธีแก้ไขที่เจอบ่อยที่สุดมาให้เช็กทีละข้อครับ

ส่วนที่ 1 : ปัญหาระหว่างการติดตั้ง Windows (During Installation)
1. หน้าเลือกไดรฟ์มองไม่เห็น SSD หรือ NVMe
  • สาเหตุ: พีซีหรือโน้ตบุ๊กชิป Intel รุ่นใหม่ๆ ที่เปิดใช้งานฟีเจอร์ Intel VMD / Intel RST ทำให้ตัวติดตั้งมาตรฐานมองไม่เห็นไดรฟ์เก็บข้อมูล หรือไดรฟ์มีโครงสร้างพาร์ติชันแบบ MBR ในขณะที่บูตด้วยโหมด UEFI
  • วิธีแก้: ดาวน์โหลดไดรเวอร์ Storage (IRST / VMD) ของรุ่นเครื่องแตกไฟล์ใส่ไว้ใน USB แล้วกดปุ่ม Load Driver ในหน้าเลือกไดรฟ์ หรือหากต้องการล้างดิสก์ใหม่ทั้งหมดให้แปลงรูปแบบดิสก์เป็น GPT (ระวังข้อมูลในดิสก์จะหายทั้งหมด)
2. ติดหน้าแจ้งเตือนสเปกไม่ผ่านเกณฑ์ Windows 11 (TPM 2.0 / Secure Boot / CPU)
  • สาเหตุ: ฮาร์ดแวร์ของเครื่องรุ่นเก่าไม่ตรงตามข้อกำหนดขั้นต่ำที่ Microsoft บังคับไว้ หรือยังไม่ได้เปิดฟีเจอร์ความปลอดภัยใน BIOS
  • วิธีแก้: เข้าไปเปิด TPM (fTPM / PTT) และ Secure Boot ใน BIOS หากฮาร์ดแวร์รองรับ หรือสร้างตัวติดตั้ง USB ใหม่ด้วยโปรแกรม Rufus โดยติ๊กเลือกตัวเลือกข้ามข้อจำกัดสเปก
3. ติดตั้งค้าง หรือรีสตาร์ทวนกลับไปหน้าเริ่มติดตั้งใหม่ซ้ำๆ
  • สาเหตุ: ไฟล์ .iso เสียหาย อ่านข้อมูลจาก USB สะดุด หรือเครื่องยังตั้งค่าให้บูตจาก USB เป็นอันดับแรกทำให้วนกลับมาหน้าติดตั้งเดิมหลังรีสตาร์ท
  • วิธีแก้: เมื่อเครื่องคัดลอกไฟล์เสร็จและเริ่มรีสตาร์ทครั้งแรก ให้สังเกตถ้าวนกลับมาหน้าติดตั้งเดิมให้ถอด USB Flash Drive ออก หรือเปลี่ยนลำดับการบูตใน BIOS ให้บูตจาก SSD/Windows Boot Manager เป็นอันดับแรก
4. ติดหน้าบังคับเชื่อมต่ออินเทอร์เน็ตและลงชื่อเข้าใช้บัญชี Microsoft
  • สาเหตุ: ขั้นตอนตั้งค่าเริ่มต้น (OOBE) ของ Windows 10/11 รุ่นใหม่บังคับให้ต่ออินเทอร์เน็ตและล็อกอินด้วย Microsoft Account ก่อนจึงจะเข้าหน้า Desktop ได้
  • วิธีแก้: หากสร้าง USB ด้วย Rufus สามารถติ๊กข้ามข้อจำกัดนี้ได้ตั้งแต่ตอนสร้าง หรือหากอยู่หน้าตั้งค่าแล้วให้กด Shift + F10 เพื่อเปิดหน้าต่าง Command Prompt พิมพ์คำสั่ง OOBE\BYPASSNRO แล้วกด Enter เครื่องจะรีสตาร์ทและมีตัวเลือกตั้งค่าแบบออฟไลน์ (I don't have internet) ขึ้นมาให้ใช้งาน
ส่วนที่ 2 : ปัญหาหลังลง Windows เสร็จแล้วใช้งานไม่ได้ (Post-Installation Issues)
1. ไม่มีเสียง / เสียงไม่ออกลำโพงหรือหูฟัง
  • สาเหตุ: Windows ยังใช้ไดรเวอร์เสียงพื้นฐาน หรือระบบสลับช่องออกเสียง (Output) ไปออกที่จอมอนิเตอร์ผ่านสาย HDMI/DisplayPort แทนลำโพงหลัก
  • วิธีแก้: คลิกไอคอนรูปำโพงที่มุมขวาล่างของหน้าจอเพื่อสลับ Sound output ให้ตรงกับลำโพงหรือหูฟัง จากนั้นเชื่อมต่ออินเทอร์เน็ตแล้วรัน Windows Update หรือดาวน์โหลดไดรเวอร์เสียง (เช่น Realtek) ของรุ่นเมนบอร์ด/โน้ตบุ๊กมาติดตั้ง
2. ต่อ Wi-Fi หรือสาย LAN ไม่ได้ / มองไม่เห็นเครือข่าย
  • สาเหตุ: ขาดไดรเวอร์การ์ด Wi-Fi หรือ LAN โดยเฉพาะชิปเครือข่ายรุ่นใหม่ๆ ที่ไม่มีไดรเวอร์ฝังมากับตัวติดตั้ง Windows
  • วิธีแก้: เสียบสายชาร์จมือถือเข้ากับคอมพิวเตอร์แล้วเปิด แชร์เน็ตผ่านสาย USB (USB Tethering) เพื่อใช้อินเทอร์เน็ตชั่วคราวให้ Windows Update ดึงไดรเวอร์มาลง หรือใช้เครื่องอื่นดาวน์โหลดไดรเวอร์ Wi-Fi/LAN ของรุ่นเครื่องใส่ Flash Drive มาติดตั้ง
3. หน้าจอภาพใหญ่เบี้ยว ปรับความละเอียดหรือรีเฟรชเรตไม่ได้
  • สาเหตุ: ระบบยังใช้ไดรเวอร์แสดงผลพื้นฐาน (Microsoft Basic Display Adapter) เพราะยังไม่ได้ลงไดรเวอร์การ์ดจอ
  • วิธีแก้: ดาวน์โหลดและติดตั้งไดรเวอร์การ์ดจอตัวล่าสุดให้ตรงรุ่น (Intel / AMD / NVIDIA) จากเว็บไซต์ผู้ผลิตโดยตรง แล้วเข้าไปปรับความละเอียดหน้าจอที่ Settings > System > Display
4. พอร์ต USB บางช่องใช้ไม่ได้ หรือทัชแพดโน้ตบุ๊กไม่ทำงาน
  • สาเหตุ: ขาด Chipset Driver หรือ Serial IO / Touchpad Driver ของเมนบอร์ดหรือโน้ตบุ๊กรุ่นนั้นๆ
  • วิธีแก้: ติดตั้ง Chipset Driver ของรุ่นเครื่องเป็นอันดับแรก จากนั้นตามด้วยไดรเวอร์ทัชแพดจากหน้าเว็บสนับสนุนของผู้ผลิตเครื่อง
5. เปิดเครื่องแล้วเด้งเข้าหน้า BIOS หรือค้างหน้าโลโก้หลังลงเสร็จ
  • สาเหตุ: ลำดับการบูต (Boot Priority) ยังค้างอยู่ที่อุปกรณ์อื่น หรือตั้งโหมดบูต (UEFI / Legacy) สลับกันหลังจากถอด USB ออก
  • วิธีแก้: ตรวจสอบให้แน่ใจว่าถอด USB Flash Drive ออกแล้ว เข้าหน้า BIOS ไปที่หัวข้อ Boot แล้วตั้งให้ Windows Boot Manager (หรือไดรฟ์ที่ลง Windows ไว้) เป็นลำดับบูตที่ 1 จากนั้นกด F10 เพื่อบันทึก
6. เปิดโปรแกรมพื้นฐานหรือโปรแกรมเก่าไม่ได้ / ฟ้องขาดไฟล์ระบบ
  • สาเหตุ: เครื่องที่เพิ่งลง Windows ใหม่ยังขาดชุดคำสั่งเสริม (Runtime Library) ที่โปรแกรมต่างๆ ต้องเรียกใช้งาน เช่น Visual C++ หรือ .NET Framework
  • วิธีแก้: อัปเดต Windows Update ให้ครบทุกรายการ และติดตั้งแพ็กเกจพื้นฐานที่จำเป็น ได้แก่ Microsoft Visual C++ Redistributable และ .NET Framework
เคล็ดลับหลังลง Windows เสร็จใหม่ๆ: สิ่งแรกที่ควรทำเมื่อเข้าหน้า Desktop และต่ออินเทอร์เน็ตได้แล้ว คือเข้าไปที่ Settings > Windows Update แล้วกด Check for updates ปล่อยให้ระบบดาวน์โหลดและติดตั้งไดรเวอร์พื้นฐาน รวมถึงแพตช์ระบบให้ครบก่อน จากนั้นจึงค่อยลงโปรแกรมใช้งานทั่วไปครับ

Complete Guide to Installing Windows 10 & Windows 11 via USB Flash Drive

Complete Guide to Installing Windows 10 & Windows 11 via USB Flash Drive

Since modern desktop PCs and laptops no longer come with optical CD/DVD drives, installing Windows 10 or Windows 11 today relies primarily on a USB Flash Drive (Thumb Drive) with at least 8GB of capacity. Using utility tools such as Rufus or Microsoft's Media Creation Tool, you can create a bootable installation drive and configure your computer's BIOS/UEFI to boot directly from USB.

Part 1: Overview of Modern Windows Installation
  1. Prepare a USB Flash Drive and Installation Image: Use an 8GB–32GB USB drive (all existing data on the drive will be erased) along with an official Windows .iso image and a bootable USB creator like Rufus.
  2. Configure Your PC to Boot from USB: Plug the USB drive into the target computer, power it on, and immediately press the Boot Menu or BIOS/UEFI key (commonly F2, F12, Del, or Esc depending on the manufacturer), then select your USB drive.
  3. Run the Windows Setup Wizard: Choose your language, time format, and keyboard layout. Select the target drive/partition carefully (to avoid overwriting important data), and wait for Windows to copy files and reboot several times into the initial setup screen.
  4. Initial Configuration and Drivers: Complete regional, keyboard, and user account settings. Connect to the internet so Windows Update can automatically download essential drivers, then install any specialized hardware drivers as needed.
Important Notes for Windows 11 & Modern Hardware:
  • Security Requirements: Windows 11 enforces TPM 2.0 and Secure Boot checks, as well as requiring an internet connection and a Microsoft Account during initial setup (these restrictions can be customized/bypassed when creating the drive in Rufus).
  • Missing SSD During Setup: On some newer Intel-based laptops and desktops, the Windows installer may not detect the internal SSD due to Intel VMD / RST storage controllers. You will need to extract the storage driver onto your USB drive and click Load Driver on the disk selection screen.
Part 2: Step-by-Step Guide to Creating a Bootable USB with Rufus
Data Loss Warning: Creating a bootable drive with Rufus will completely format and erase all data on the selected USB Flash Drive. Back up any important files before proceeding.
  1. Insert USB and Prepare the ISO File: Plug your USB Flash Drive into a working PC and have your Windows 10 or Windows 11 .iso file ready (or use the built-in download option in Rufus).
  2. Launch Rufus and Select Your Device: Open Rufus (no installation needed for the portable version). Under Device, verify and select your USB Flash Drive—make sure not to select an external hard drive or system drive by mistake.
  3. Select the Windows ISO Image: Keep Boot selection set to Disk or ISO image, then click the SELECT button to browse and load your Windows .iso file.
  4. Configure Partition Scheme and Target System:
    • Modern PCs (UEFI / Windows 11 compatible): Set Partition scheme to GPT; the Target system will automatically switch to UEFI (non CSM).
    • Older PCs (Legacy BIOS): Set Partition scheme to MBR and Target system to BIOS or UEFI.
  5. Customize Windows 11 Options (Optional): When you click START, a Windows User Experience dialog will appear. You can check options to bypass TPM 2.0 / Secure Boot requirements, skip the mandatory online Microsoft Account requirement, or pre-create a local user account, then click OK.
  6. Confirm and Wait for Completion: Click OK to confirm formatting the USB drive. Wait until the progress bar fills completely and displays READY in green, then click CLOSE and safely eject the USB drive.
Part 3: Troubleshooting When Your PC Won't Boot from the USB Drive

If your computer ignores the USB drive, boots straight back into the existing OS, or hangs on a black screen, work through the following checklist:

Common Cause How to Check and Fix
1. USB Not Selected in Boot Menu On desktop PCs, plug the USB drive directly into a rear motherboard USB port. Power on the PC and repeatedly tap the Boot Menu key immediately—such as F12 (Dell/Acer/Gigabyte), F8 (ASUS), F11 (MSI/ASRock), or F9/Esc (HP)—and select your USB device (usually prefixed with UEFI:).
2. GPT / MBR Mismatch with BIOS If the USB drive does not appear in the Boot Menu, enter BIOS (Del or F2) and check your Boot Mode. If BIOS is set to UEFI, recreate the Rufus USB using GPT. If BIOS is set to Legacy / CSM, recreate it using MBR.
3. Fast Boot Skipping USB Detection If startup moves too quickly to press the BIOS or Boot Menu key, enter BIOS and temporarily disable Fast Boot so the system initializes USB ports before booting.
4. Incomplete or Corrupted USB Files Inspect the USB drive on another PC to ensure the boot, efi, and sources folders along with setup.exe are intact. If files are missing or corrupted, try a different USB port or flash drive and recreate it.
Part 4: Fixing the "Security Boot Fail" Warning Screen

A red or blue warning pop-up reading Security Boot Fail (or Secure Boot Violation / Invalid signature detected) occurs when your motherboard's Secure Boot feature blocks the USB bootloader—commonly seen when using customized Rufus installation media. You can resolve this by temporarily disabling Secure Boot in BIOS:

  1. Enter BIOS/UEFI Setup: Press OK or Enter to dismiss the warning box. As the system restarts, immediately tap your BIOS key repeatedly (e.g., F2, Del, or F10).
  2. Unlock Grayed-Out Options (Acer / Lenovo & Select Brands): If the Secure Boot option is grayed out and cannot be selected, navigate to the Security tab, choose Set Supervisor Password, and set a simple temporary password (such as 1234). This will unlock the Secure Boot setting.
  3. Set Secure Boot to Disabled: Navigate to the Boot or Security tab, locate Secure Boot (or Secure Boot Control), and change its status from Enabled to Disabled.
  4. Save and Retry Booting: Press F10 (Save & Exit), select Yes to save changes and reboot, then open your Boot Menu and select the USB Flash Drive to launch Windows Setup normally.
Post-Installation Recommendation: Once Windows and all device drivers are installed, you can re-enter BIOS, switch Secure Boot back to Enabled, and clear the temporary Supervisor Password (if set) to maintain full system security.

คู่มือการลง Windows 10 และ Windows 11 ยุคใหม่ด้วย USB Flash Drive (ฉบับสมบูรณ์)

คู่มือการลง Windows 10 และ Windows 11 ยุคใหม่ด้วย USB Flash Drive (ฉบับสมบูรณ์)

ในยุคปัจจุบันคอมพิวเตอร์ตั้งโต๊ะและโน้ตบุ๊กส่วนใหญ่ไม่มีช่องอ่านแผ่น CD/DVD อีกต่อไป การติดตั้ง Windows 10 หรือ Windows 11 จึงเปลี่ยนมาใช้ USB Flash Drive (Thumb Drive) ความจุ 8GB ขึ้นไปเป็นมาตรฐานหลัก โดยอาศัยโปรแกรมช่วยสร้างตัวติดตั้งอย่าง Rufus หรือ Media Creation Tool ของ Microsoft แล้วตั้งค่าให้เครื่องบูตผ่านพอร์ต USB แทนการใช้แผ่นดิสก์เหมือนในอดีต

ส่วนที่ 1 : ภาพรวมขั้นตอนการลง Windows ยุคใหม่
  1. เตรียม USB Flash Drive และไฟล์ติดตั้ง: ใช้ Flash Drive ความจุ 8GB – 32GB (ข้อมูลในไดรฟ์จะถูกลบทั้งหมด) ร่วมกับไฟล์ติดตั้ง Windows แบบ .iso และโปรแกรมสร้างตัวบูตอย่าง Rufus
  2. ตั้งค่าให้เครื่องบูตจาก USB: เสียบ USB เข้ากับเครื่องเป้าหมาย เปิดเครื่องแล้วกดปุ่มเข้าหน้า Boot Menu หรือ BIOS/UEFI ทันที (เช่น F2, F12, Del หรือ Esc แล้วแต่ยี่ห้อ) จากนั้นเลือกบูตจากไดรฟ์ USB
  3. เข้าสู่หน้าติดตั้ง Windows: เลือกภาษา รูปแบบเวลา และแป้นพิมพ์ เลือกไดรฟ์/พาร์ติชันที่ต้องการติดตั้ง (ระวังเลือกไดรฟ์ให้ถูกต้องเพื่อป้องกันข้อมูลสูญหาย) แล้วรอระบบคัดลอกไฟล์และรีสตาร์ทจนเข้าสู่หน้าตั้งค่าเริ่มต้น
  4. ตั้งค่าเบื้องต้นและติดตั้งไดรเวอร์: ตั้งค่าภูมิภาค บัญชีผู้ใช้ และเชื่อมต่ออินเทอร์เน็ตเพื่อให้ Windows Update ดึงไดรเวอร์พื้นฐานมาให้ครบถ้วน จากนั้นจึงลงไดรเวอร์เฉพาะทางเพิ่มเติม
ข้อควรรู้สำหรับ Windows 11 และเครื่องรุ่นใหม่:
  • ข้อกำหนดระบบความปลอดภัย: Windows 11 บังคับตรวจสอบ TPM 2.0 และ Secure Boot รวมถึงการเชื่อมต่อบัญชี Microsoft ในขั้นตอนแรกเริ่ม (ซึ่งสามารถปรับแต่งข้ามข้อจำกัดได้ตอนสร้าง USB ด้วย Rufus)
  • มองไม่เห็นไดรฟ์ SSD ตอนลง Windows: โน้ตบุ๊กหรือพีซีที่ใช้ชิป Intel รุ่นใหม่บางรุ่นอาจซ่อนไดรฟ์ SSD เนื่องจากฟีเจอร์ Intel VMD / RST ต้องโหลดไดรเวอร์ Storage ใส่เพิ่มไว้ใน USB เพื่อกด Load Driver ในหน้าเลือกไดรฟ์
ส่วนที่ 2 : วิธีสร้าง USB Flash Drive ลง Windows ด้วยโปรแกรม Rufus
คำเตือนสำคัญ: การสร้างตัวติดตั้งด้วย Rufus จะทำการล้างข้อมูล (Format) ใน USB Flash Drive ทั้งหมด กรุณาย้ายไฟล์สำคัญออกจาก Flash Drive ให้เรียบร้อยก่อนเริ่มทำ
  1. เสียบ USB และเตรียมไฟล์ ISO: เสียบ USB Flash Drive เข้ากับคอมพิวเตอร์ และเตรียมไฟล์ .iso ของ Windows 10 หรือ Windows 11 ไว้ในเครื่อง (หรือใช้ฟีเจอร์ดาวน์โหลดในตัวโปรแกรม Rufus)
  2. เปิดโปรแกรม Rufus และเลือกอุปกรณ์: เปิดโปรแกรม Rufus ที่ช่อง Device ให้ตรวจสอบและเลือกชื่อ USB Flash Drive ของเราให้ถูกต้อง ห้ามเลือกผิดเป็นฮาร์ดดิสก์หรือ SSD ของเครื่อง
  3. เลือกไฟล์ Windows ISO: ในหัวข้อ Boot selection ให้คงค่าเป็น Disk or ISO image แล้วคลิกปุ่ม SELECT เพื่อเลือกไฟล์ .iso ที่เตรียมไว้
  4. ตั้งค่า Partition scheme และ Target system:
    • คอมพิวเตอร์ยุคใหม่ (รองรับ UEFI / Windows 11): เลือก Partition scheme เป็น GPT และช่อง Target system จะเป็น UEFI (non CSM) อัตโนมัติ
    • คอมพิวเตอร์รุ่นเก่า (Legacy BIOS): เลือก Partition scheme เป็น MBR และ Target system เป็น BIOS or UEFI
  5. ตั้งค่าตัวเลือกเพิ่มเติม (เฉพาะ Windows 11): เมื่อกดปุ่ม START จะมีหน้าต่าง Windows User Experience เด้งขึ้นมา สามารถติ๊กเลือกข้ามข้อจำกัด TPM 2.0 / Secure Boot, ข้ามการบังคับต่อเน็ต/บัญชี Microsoft หรือสร้างบัญชี Local อัตโนมัติตามความเหมาะสม แล้วกด OK
  6. ยืนยันและรอจนเสร็จสิ้น: กด OK เพื่อยืนยันการล้างข้อมูลใน USB แล้วรอจนแถบสถานะด้านล่างวิ่งจนเต็มและขึ้นคำว่า READY (แถบสีเขียว) จากนั้นกด CLOSE และถอด USB ออกไปใช้งานได้ทันที
ส่วนที่ 3 : การแก้ปัญหาเสียบ USB แล้วไม่ยอมบูตเข้าหน้าติดตั้ง Windows

หากสร้าง USB เสร็จแล้วนำไปเสียบเครื่องเป้าหมาย แต่เครื่องยังบูตเข้า Windows เดิมหรือค้างหน้าจอดำ สามารถไล่ตรวจสอบและแก้ไขตามขั้นตอนต่อไปนี้:

สาเหตุที่พบบ่อย แนวทางการตรวจสอบและแก้ไข
1. ยังไม่ได้เลือกบูตจาก USB เสียบ USB เข้าที่ พอร์ตด้านหลังเมนบอร์ด (หากเป็น PC ตั้งโต๊ะ) เปิดเครื่องแล้วกดปุ่ม Boot Menu รัวๆ ทันที เช่น F12 (Dell/Acer/Gigabyte), F8 (ASUS), F11 (MSI/ASRock) หรือ F9/Esc (HP) แล้วเลือกชื่อ USB ของเรา (มักขึ้นต้นด้วยคำว่า UEFI:)
2. โหมด GPT / MBR ไม่ตรงกับ BIOS หากใน Boot Menu มองไม่เห็นชื่อ USB ให้เข้าหน้า BIOS (Del หรือ F2) ดูที่หัวข้อ Boot Mode หาก BIOS เป็น UEFI ต้องสร้าง Rufus แบบ GPT แต่หาก BIOS เป็น Legacy / CSM ต้องสร้าง Rufus แบบ MBR
3. Fast Boot ทำงานเร็วเกินไป หากกดปุ่มเข้า BIOS หรือ Boot Menu ไม่ทัน ให้เข้าไปปิดฟีเจอร์ Fast Boot ใน BIOS ชั่วคราว เพื่อให้เครื่องตรวจสอบพอร์ต USB ก่อนเริ่มบูตระบบ
4. ไฟล์ใน USB ไม่สมบูรณ์ นำ USB ไปเปิดดูในเครื่องอื่นว่ามีโฟลเดอร์ boot, efi, sources และไฟล์ setup.exe ครบหรือไม่ หากไฟล์ขาดหายให้เปลี่ยนพอร์ตหรือเปลี่ยน Flash Drive แล้วสร้างใหม่
ส่วนที่ 4 : วิธีแก้ปัญหาหน้าจอแจ้งเตือน "Security Boot Fail"

ข้อความแจ้งเตือนสีแดงหรือสีน้ำเงินที่ระบุว่า Security Boot Fail (หรือ Secure Boot Violation / Invalid signature detected) เกิดจากระบบรักษาความปลอดภัย Secure Boot ในเมนบอร์ดบล็อกไฟล์บูตใน USB (มักพบเมื่อใช้ตัวติดตั้งที่ปรับแต่งข้ามสเปกด้วย Rufus) สามารถแก้ไขได้โดยการเข้าไปปิด Secure Boot ชั่วคราวใน BIOS ดังนี้:

  1. เข้าสู่หน้า BIOS/UEFI: กด OK หรือ Enter เพื่อปิดหน้าต่างแจ้งเตือน เมื่อเครื่องรีสตาร์ทให้กดปุ่มเข้า BIOS รัวๆ ทันที (เช่น F2, Del หรือ F10)
  2. ปลดล็อกเมนูสีเทา (เฉพาะบางยี่ห้อ เช่น Acer / Lenovo): หากพบว่าหัวข้อ Secure Boot เป็นสีเทาไม่สามารถเลื่อนไปแก้ไขได้ ให้ไปที่แท็บ Security แล้วเลือก Set Supervisor Password ตั้งรหัสผ่านชั่วคราว (เช่น 1234) ระบบจะปลดล็อกให้แก้ไขค่า Secure Boot ได้
  3. เปลี่ยนค่า Secure Boot เป็น Disabled: ไปที่แท็บ Boot หรือ Security มองหาหัวข้อ Secure Boot (หรือ Secure Boot Control) แล้วเปลี่ยนสถานะจาก Enabled เป็น Disabled
  4. บันทึกและเริ่มติดตั้งใหม่: กดปุ่ม F10 (Save & Exit) เลือก Yes เพื่อบันทึกและรีสตาร์ท จากนั้นกดปุ่ม Boot Menu เลือก USB Flash Drive เพื่อเข้าสู่หน้าติดตั้ง Windows ได้ตามปกติ
คำแนะนำหลังลง Windows เสร็จสิ้น: เมื่อติดตั้ง Windows และลงไดรเวอร์เรียบร้อยแล้ว สามารถกลับเข้าหน้า BIOS เพื่อเปลี่ยน Secure Boot กลับมาเป็น Enabled (และเคลียร์รหัสผ่าน Supervisor Password ออกหากได้ตั้งไว้) เพื่อความปลอดภัยสูงสุดในการใช้งานประจำวัน

เครื่องอ่านนิยายภาษาไทย & บันทึกเสียง เปิดไฟล์เว็บแอปด้วย Microsoft Edge

Thai Novel TTS Reader & Recorder

📖 เครื่องอ่านนิยายภาษาไทย & บันทึกเสียง (เปิดไฟล์เว็บแอปด้วย Microsoft Edge)

จำนวนตัวอักษร: 0 | จำนวนท่อน: 0
สถานะ: พร้อมใช้งาน 0% (ท่อนที่ 0 / 0)
💡 วิธีบันทึกเสียง: กดปุ่ม "🔴 อัดเสียงแท็บ (WebM)" → เลือกแท็บปัจจุบันในหน้าต่างที่เด้งขึ้นมา → ติ๊กถูกช่อง "แชร์เสียงของแท็บ (Share tab audio)" → กดแชร์ แล้วกดปุ่มเริ่มอ่านนิยาย

สินค้า01

1Prabdasak
แหวนเพชรสุดหรู
กางเกงขายาว**ขนาดใหญ่**ผ้าฝ้ายทรงBarrel
ลูกพีชอบแห้ง หวานน้อย
ส้มกลีบอบแห้ง พริกเกลือ
เลมอนอบแห้งเคลือบน้ำผึ้งแท้
ถุงขยะดำชนิดหนาพิเศษกลิ่นไม่ฉุน
พวงกุญแจคีย์แคปใส่ชื่อได้
ต่างหูหนีบแบบห่วง(แป้นคลิปหนีบโลหะ)
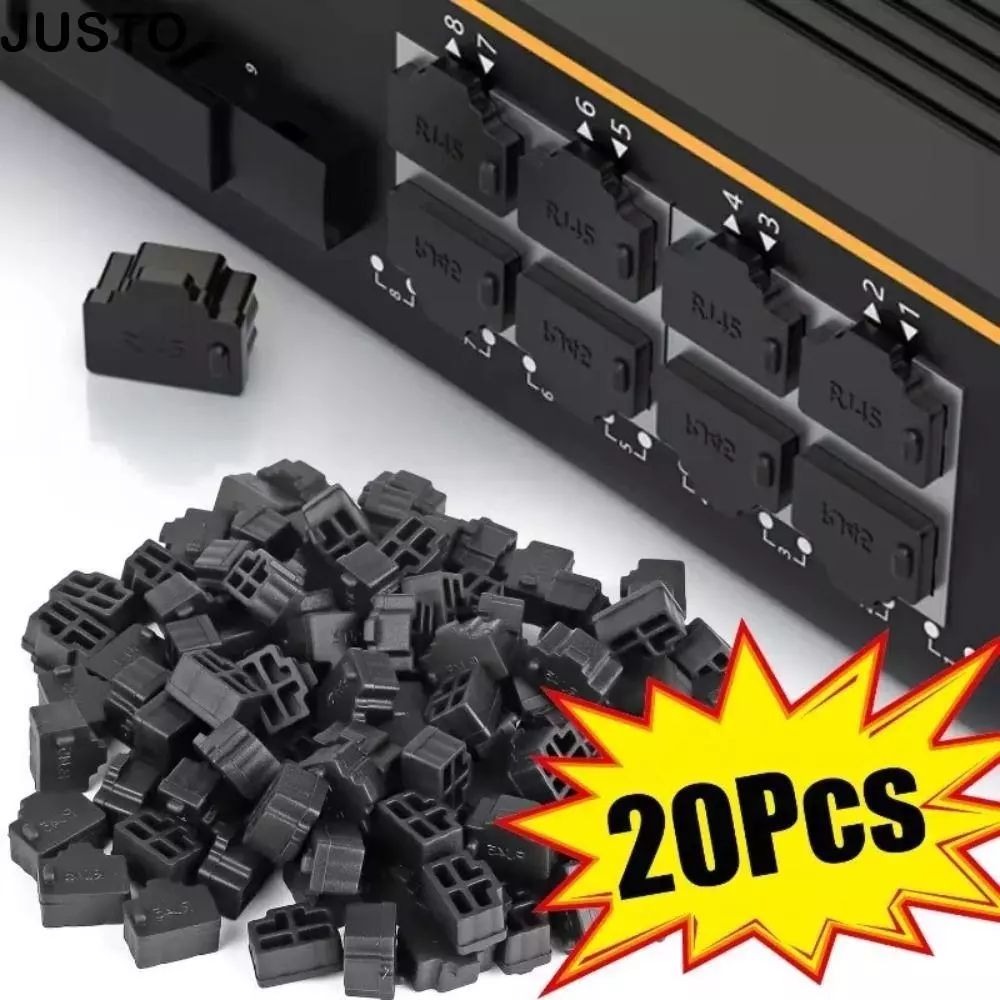
หมวกกันฝุ่นซิลิโคน RJ45
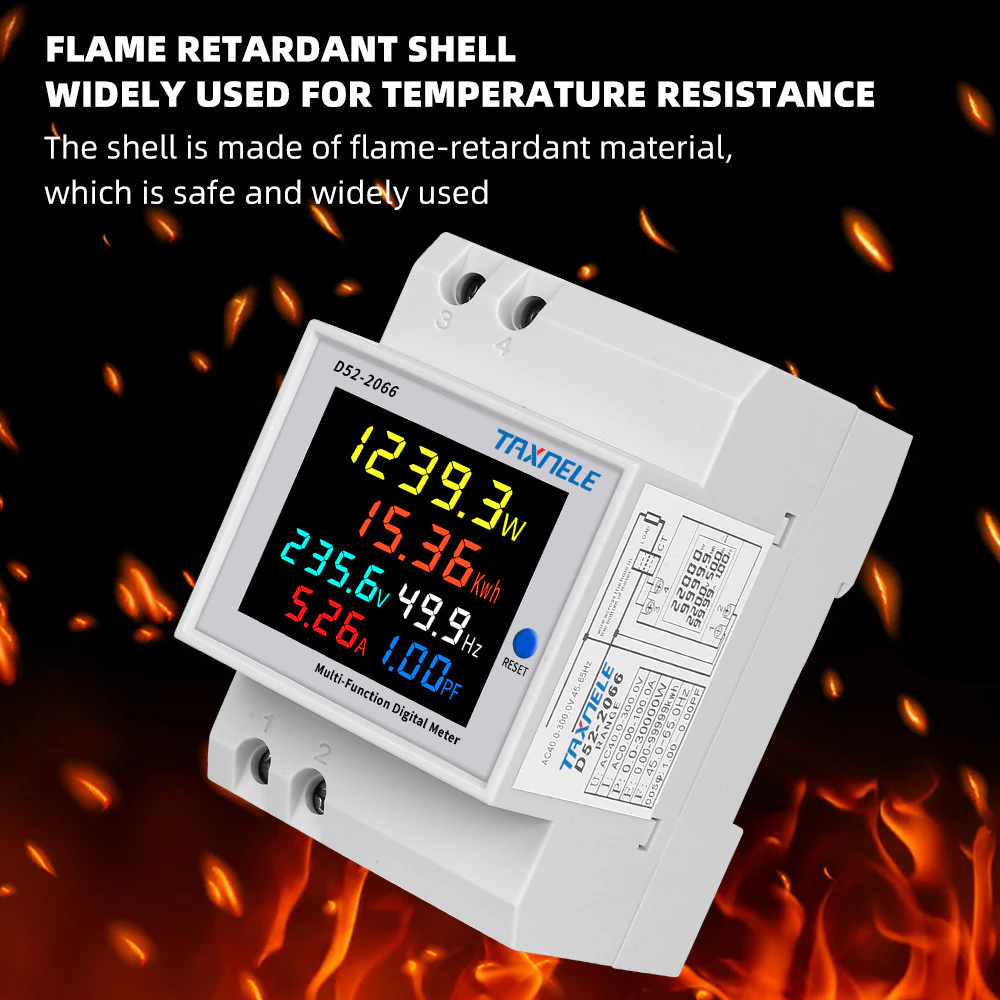
เครื่องวัดแรงดันไฟฟ้า110V 220V 380V 100A KWH
เก้าอี้นอนแมว
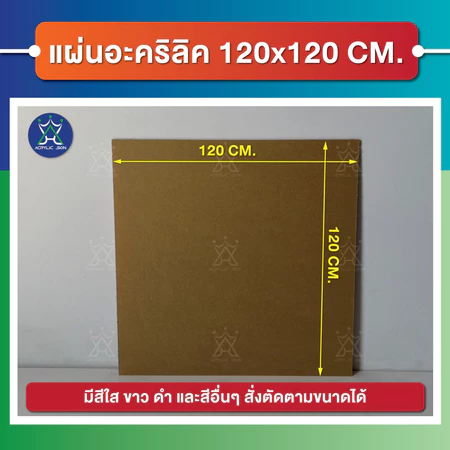
แผ่นอะคริลิคใส(Acrylic Clear) ขนาด 120 x 120 cm
เครื่องตัดหญ้าไฟฟ้าไร้สาย 3980W
เรื่องเล่า 100 ล้านวิว อ่านแล้วชีวิตโคตรดี
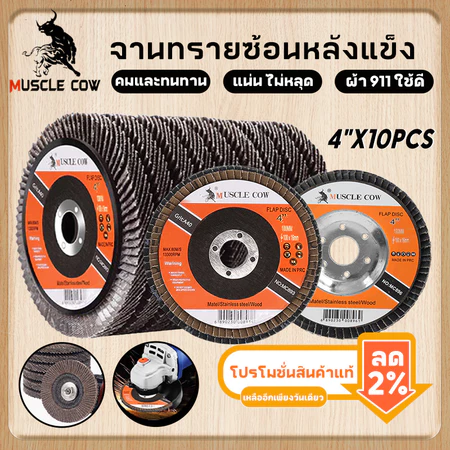
กระดาษทรายซ้อนหลังแข็ง 1ชุด=10ชิ้น
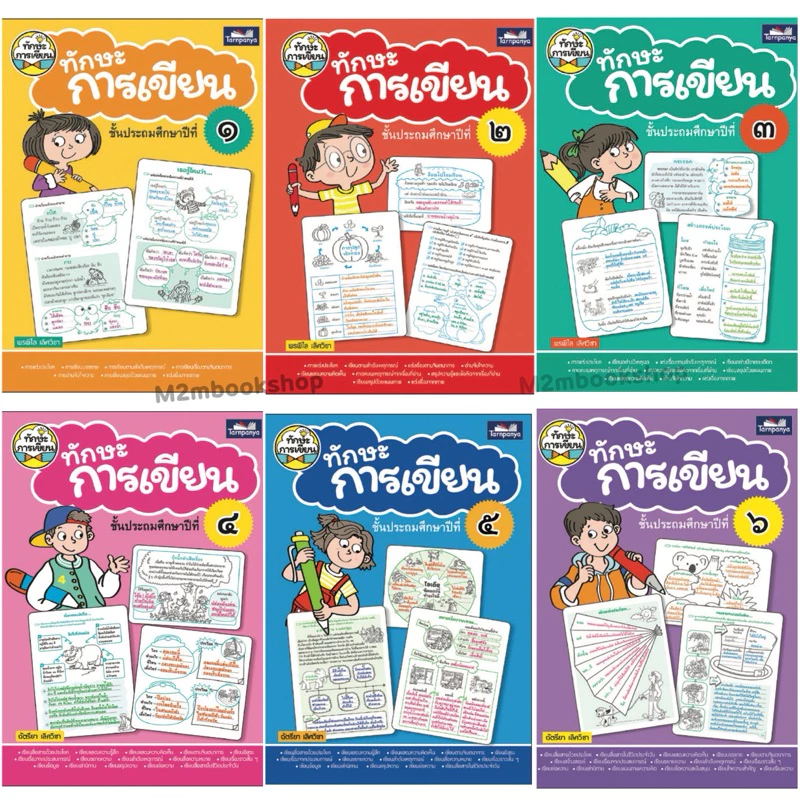
แบบฝึกหัดทักษะการเขียน ประถมศึกษา 1-6
ฮอร์โมนกระตุ้นน้ำยาง
มีดกรีดยาง999 คอตัด
กล้วยไม้หวายคละสีเซ็ต 5 ต้น แถมฟรี 1 ต้น
สีไม้ 12 สี หัวเดียวมาสเตอร์อาร์ต
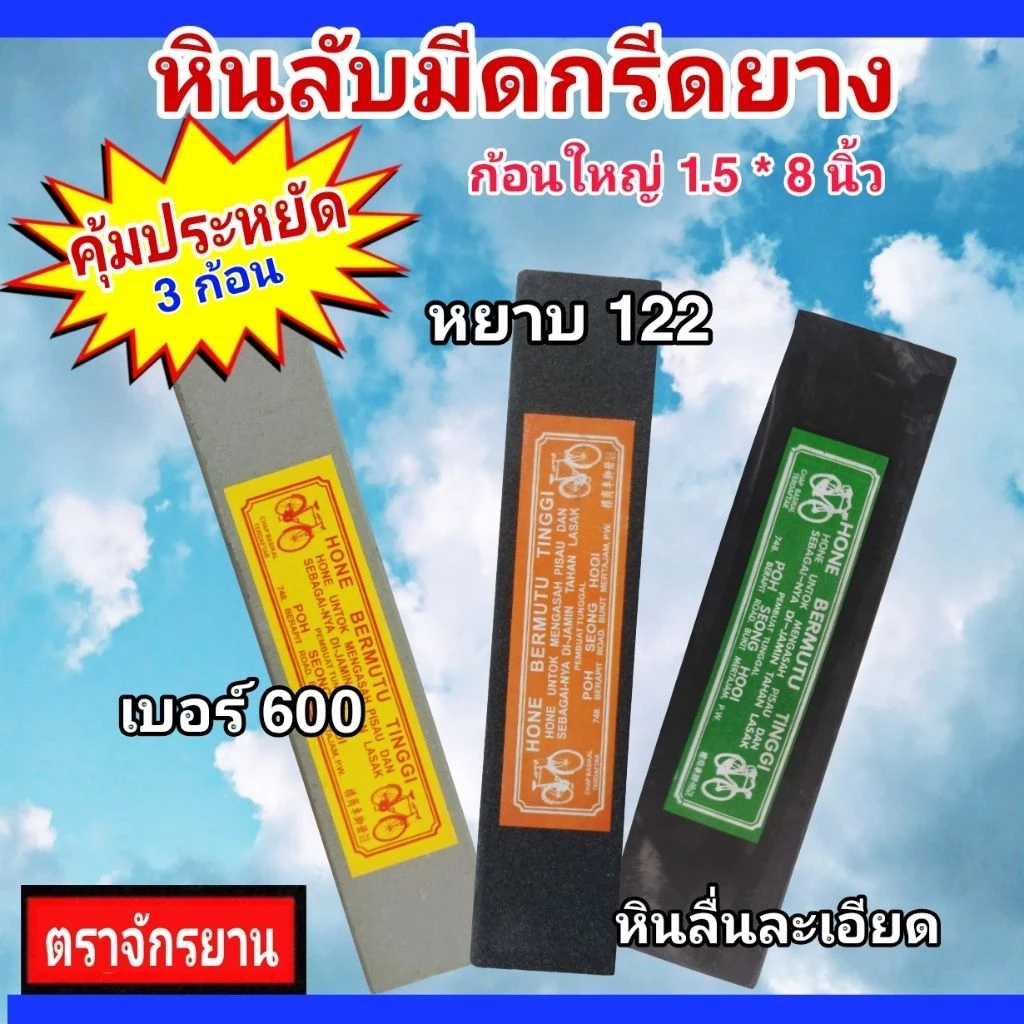
หินลับมีดกรีดยาง
ผ้าทรายเรียงซ้อน หลังอ่อน/หลังแข็ง
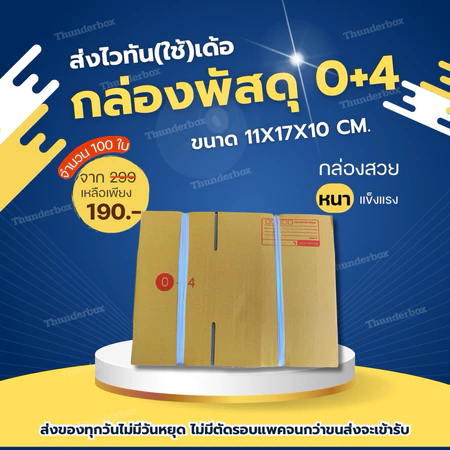
กล่องไปรษณีย์ 0+4(100ใบ)

สินค้า ice

สินค้า พรีเมี่ยม

สินค้า 1
กล่องเลี้ยงชันโรง เหมาะกับพันธ์ตัวเล็กๆ
สินค้า 2
พระสมเด็จวัดระฆัง
สินค้า 3
กระต่ายขูดมะพร้าวแบบนั่ง
สินค้า 4
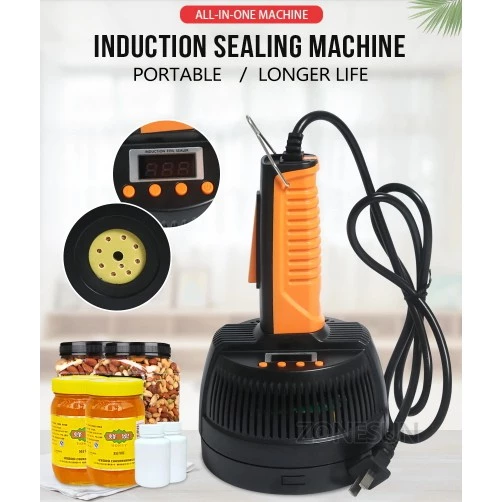
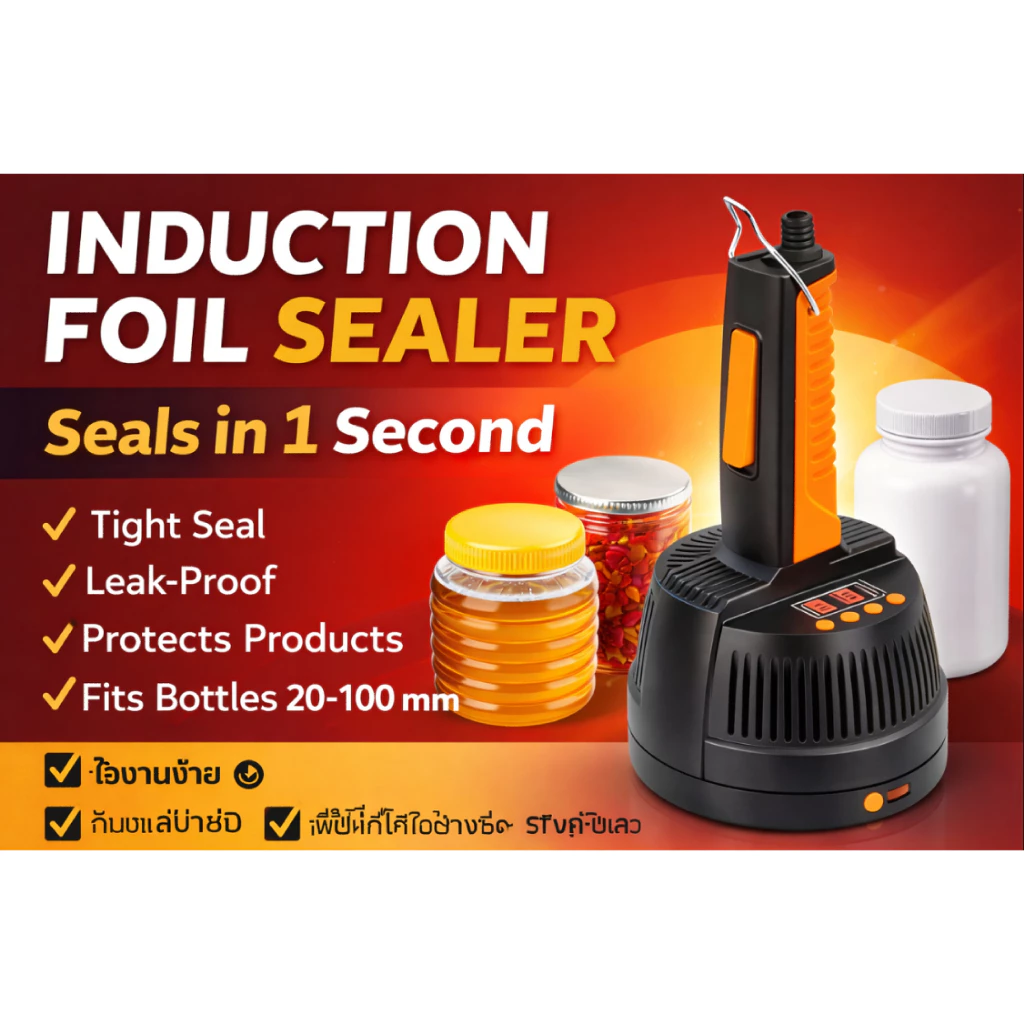
เครื่องซีลฝาฟอยล์
สินค้า 5
กล่องเลี้ยงชันโรง พร้อมขาตั้ง
สินค้า 6
ล่อชันโรง จัดชุดฟีโรโมน 20ซีซี+ขี้ชัน 1 ตลับ
สินค้า 7
ชิงช้าไม้ จากไม้เนื้อแข็ง
สินค้า 8
กล่องเลี้ยงชันโรง แบบ 2 ชั้น ขนาด A4
สินค้า 9
ฟีโรโมนล่อชันโรง มัดรวมกับ ขี้ชันโรง
สินค้า 10
หน่อกล้วยตานี 1 หน่อ
สินค้า 11
เก้าอี้ไม้ สำหรับนั่งเล่น
สินค้า 12
กล่องเลี้ยงชันโรง
สินค้า 13
กล่องเลี้ยงผึ้งโพรง (ส่งทันที)
สินค้า 14
หน่อกล้วยพระเทพ หน่อกล้วยพระราชทาน
สินค้า 15
สโมคเกอร์ เครื่องพ่นควันผึ้ง
สินค้า 16
Inverter tester มิเตอร์สําหรับใช้ในการทดสอบกระแสไฟฟ้า
สินค้า 17
ไขผึ้งสำหรับผึ้งโพรงไทย
สินค้า 18
ไม้ทับกล้วยปิ้ง ไม้หนาขนาดใหญ่
สินค้า 19
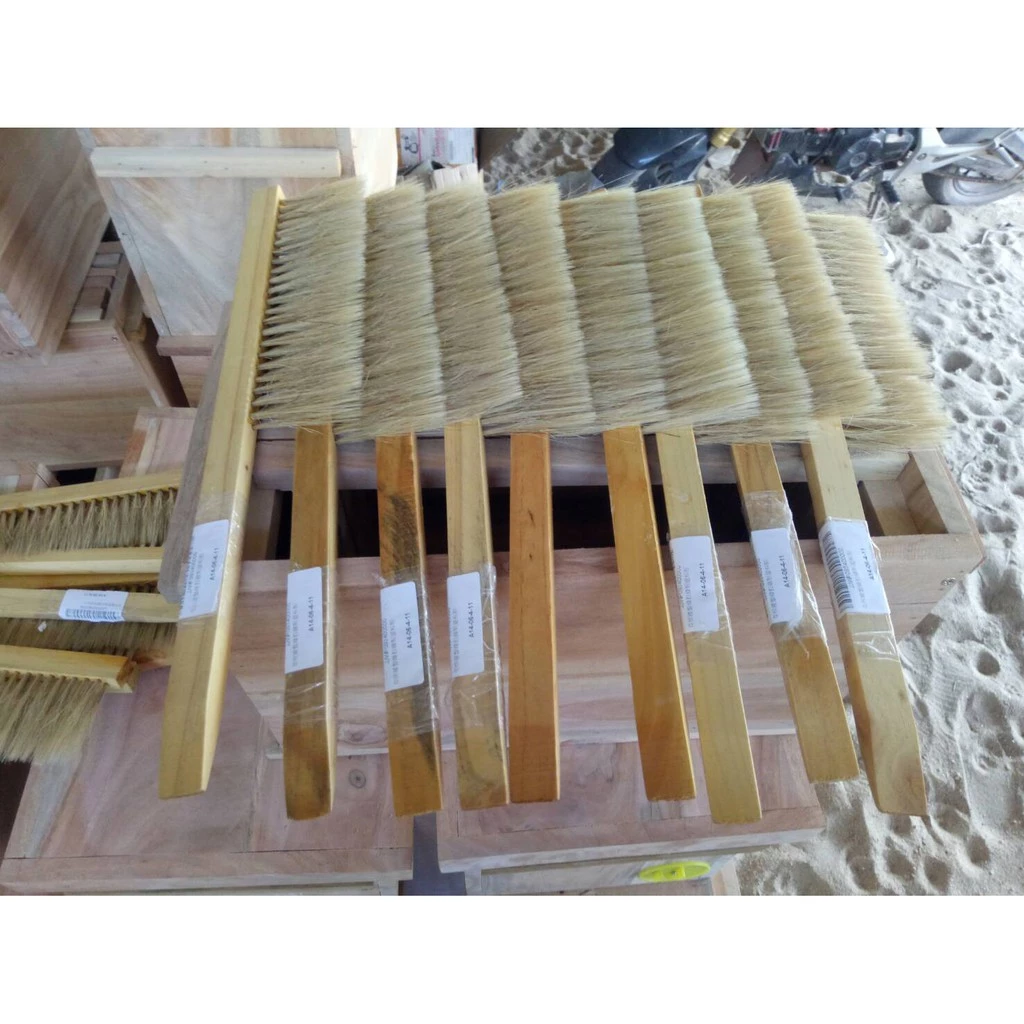
แปรงขนม้าสำหรับปัดตัวผึ้ง/div>
สินค้า 20
ฟีโรโมน ฉีดกล่องเลี้ยงชันโรง

สินค้าร้านกาน้ำชา

ไทยทำมือ

กล่องเลี้ยงชันโรง แบบ 2 ชั้น ขนาด A4 รับแล้วยกไปตั้งได้เลย
ไม้ทับกล้วยปิ้ง รุ่นอัพเกรด แข็งแรงทนทานมากกว่าเดิม14*16
ฟีโรโมน+ไขล่อผึ้งโพรง (ซื้อ2แถม 1) จัดให้ประหยัด ฟ๊โรโมนตราหัวกระทิง 2 ขวด แถมไขล่อผึ้งไปอีก 1 ก้อน
กล่องเลี้ยงชันโรง สำเร็จรูป แบบยกไปตั้งได้เลย เราจัดเตรียมทำให้หมดแล้ว ขนาดกระดาษ เอ4 สูง 4 นิ้ว
หน่อกล้วยพระเทพ หน่อกล้วยพระราชทาน หน่อกล้วยน้ำว้ายักษ์ หน่อกล้วยน้ำว้า มีชื่อเรียกเยอะครับ หวานมาก ดก หวีใหญ่ ต้นเตี้ย
กระต่ายขูดมะพร้าวแบบนั่ง" สไตล์วินเทจ ขูดมะพร้าวแบบชิลๆ สบายกว่า ขูดได้เยอะกว่า ใครๆ ก็ใช้แบบนี้แล้วนะ!(หนาพิเศษ)
พระสมเด็จเกศไชโยพิมพ์ 6 ชั้นพระของขวัญแจกงานบุญ พิมพ์มือ ตามตำราโบราณ ไม่ใส่กาวและสีฝุ่น 100องต์
มีดงัดรังผึ้ง มีดงัด J-type ราคาเดียว ใช้ดีทุกงานเลี้ยงผึ้ง
มีดงัดรังผึ้ง มีดงัดแบน Flat-type ใช้ดีทุกงานเลี้ยงผึ้ง
(ชุดเดียวเอาอยู่ใหม่ )ชุดฟีโรโมนและไขล่อผึ้งโพรงไทยแท้ เป็นการประหยัดได้ครบจบในหนึ่งคลิ๊ก (มีเอกสารแนะนำการเลี้ยง)
(เจ้าของสวนมาเอง)หน่อกล้วยน้ำว้า ซูปเปอร์ยักษ์ ( 1 หน่อ )ต้นตำหรับของแท้จากสวนราชินี ของแท้เจ้าเดียวในไทย
ไม้ทับกล้วยปิ้ง รุ่นอัพเกรด แข็งแรงทนทานมากกว่าเดิม 14*18*28
(ชันโรง) ฟีโรโมนล่อชันโรง มัดรวมกับ ขี้ชันโรง หรือขี้ชัน ใช้สำหรับล่อชันโรง ขนาด20ซีซี และ 8-10 กรัม
ล่องเลี้ยงชันโรง 2ชั้น ไม้บ้านเก่าแท้ มาพร้อมถาดแยกน้ำหวาน(ชุดแยกรัง)
ถาดน้ำหวานสำหรับเลี้ยงชันโรง ถาดสำหรับชั้นที่สอง ขนาด40*40ซม
กล่องล่อผึ้งโพรงไทย (พร้อมเลี้ยงยกไปตั้งได้เลย) กล่องเลี้ยงผึ้ง ที่พร้อมเลี้ยงที่สุด
(โรงงานมาเอง) ไม้ทับกล้วยปิ้ง ขนาดใหญ่: ยกระดับธุรกิจกล้วยปิ้ง สู่มืออาชีพตัวจริง อุปกรณ์ที่แข็งแกร่ง ทนทาน (14-18-28ซม)
ขาตั้งสำหรับกล่องชันโรง ใช้สำหรับตั้งหรือวางกล่องล่อหรือกล่องเลี้ยงชั้นโรง(เฉพาะขาตั้งเท่านั้น)(สูง 60 ซม)
ฟีโรโมนฉีดล่อผึ้งโพรงไทย ตราผึ้งโพรง เข้มข้น กลิ่นหอมถูกใจผึ้ง ผลิตด้วยวิธีที่ไม่ผ่านความร้อนใดๆ รักษากลิ่นนางพญา 100ซีซี
(2ก้อนประหยัด) ไขล่อผึ้งโพรงไทย ชุด 2ก้อน จัดราคาประหยัดกันไป สำหรับใช้ทากล่องล่อผึ้งโพรงไทยเท่านั้นไม่ได้ห่อส่งแบบในรูป
ไม้ทับกล้วยขนาดใหญ่ (ไม่ทาเคลือบอะไรเลย) ขนาด กว้าง 14 ยาว 18
ไม้ทุบกล้วยปิ้ง สำหรับมืออาชีพ ไม้จริง ไม้เนื้อแข็ง ขนาดยาว 38-40ซม กว้าง14-15 ซม
(ล่อผึ้งโพรงไทย ) ฟีโรโมน+ไขล่อผึ้ง สำหรับล่อผึ้งโพรงไทย จัดชุดสำเร็จรูปกันไปแบบรวมเซ็ท 20ซีซี+ไขผึ้ง 1ก้อน
สโมคเกอร์ เครื่องพ่นควันผึ้ง พ่นควันผึ้ง กาพ่นควันผึ้ง ขนาดมาตรฐาน ตามที่ท่านเคยเห็น ไม่หลอกตา เป็นสังกะสีชุบ
กล่องเลี้ยงชันโรง สายพันธ์ตัวเล็ก ที่ดีที่สุด สำหรับคนเริ่มต้นเลี้ยง เพราะเราทำให้หมดแล้ว รับแล้วยกไปตั้งได้เลย(จัดเต็ม)
ล่องเลี้ยงผึ้ง พร้อมคอนขึงลวดแล้ว 7 อัน (แถมไขล่อผึ้งโพรงและเอกสารแนะนำ) สำหรับล่อและเลี้ยงผึ้งโพรง (ทาไขเผากล่องฟรี)
ชิงช้าไม้โบราณแท้ ทำจากพื้นบ้านเก่า ยาว 80 ขนาด กว้าง 24-25 ซม
ขาตั้งกล่องเลี้ยงผึ้งจิ๋วหรือชันโรง (เฉพาะขาตั้ง) สะดวกที่สุด ติดตั้งง่าย เคลื่อนย้ายสะดวก มาแบบครบชุดพร้อมถ้วยกันมด
ไขล่อผึ้งโพรงไทย(ได้รับความนิยมสูงสุดจากผู้ใช้จริง) ทำเองจากผึ้งโพรงไทยแท้ๆในทุกกระบวนการ
( ซื้อ 1 แถม 1 ) ฟีโรโมนฉีดล่อผึ้งโพรง (ตราสิงโตทอง) ของเด็ดจากสวนราชินี จัดโปรกันไม่บ่อยนัก สำหรับล่อผึ้งโพรง
ไขล่อผึ้งโพรง สูตรเข้มข้น สำหรับทากล่องล่อผึ้งโพรงไทย 10-20 กล่อง ขนาดประมาณ 70-80 กรัม
(ชันโรง) ฟีโรโมน ฉีดกล่องล่อชันโรง สูตรสกัดเข้มข้น (รวมทุกสายพันธ์) ขนาดสเปย์ 50 ซีซี พร้อมชัน 10กรัม
กล่องล่อผึ้งโพรงไทย พร้อมเลี้ยงยกไปตั้งได้เลย ที่พร้อมเลี้ยงที่สุด ทาไขเผากล่อง แถมไขล่อผึ้ง+เอกสาร
กล่องเลี้ยงชันโรง หรือจะใช้ตั้งล่อชันโรงก็ได้ เหมาะสำหรับชันโรงพันธ์เล็ก เช่น ขนเงิน จิ็วดุ
ต้นชิงเฮาตากแห้ง กระปุก 100 กรัม
(เกรดพรีเมี่ยม) ฟีโรโมนชันโรง 100 ซีซีแบบสเปย์ เข้มข้นพิเศษ สำหรับฉีดกล่องชันโรง
ขาตั้ง กล่องเลี้ยงชันโรง ขาตั้งวางกล่องเลี้ยงชันโรง ทนนานกว่า 10ปีแน่นอน เคลื่อยย้ายสะดวกไปได้ทุกที่ทุกเวลา
กระต่ายขูดมะพร้าวไม้จริง” ของแท้ยุคแม่ ใบเหล็กฟันคม ดีไซน์แบบนั่ง สบายหลัง ใช้งานจริงจังได้(รุ่นมาตรฐาน)
แปรงขนม้า แปรงขนม้าสำหรับปัดตัวผึ้ง แปลรงขนม้าสำหรับเลี้ยงผึ้ง แปรงขนม้าปัดตัวผึ้ง
เครื่องซีลฝาฟอยล์ ขนาดปากขวดที่ใช้ได้ 20 - 100 mm (ส่งทันทีมีเอกสารภาษาไทยแนะนำ1แผ่น
กระต่ายขูดมะพร้าว "รุ่นหนาพิเศษ" ไม้เนื้อแข็งแท้ 100% งานแฮนด์เมดทำเองจากสวน
ฟีโรโมนล่อชันโรง สูตรเข้มข้น (ขนาด 100 ซีซี)สกัดจากรังชันโรงแท้ๆ ในขวดยังมีเนื้อชันแท้ๆ ปนอยู่ให้เห็นกันจะๆ
แผ่นไม้ชิงช้าโบราณ (เฉพาะแผ่นไม้ ไม่มีเชือก) คัดสรรจาก "ไม้พื้นบ้านเก่า" เนื้อไม้แห้งสนิท ยาว 40 ซม. × กว้าง 24 ซม.
สินค้า 44
สินค้า 45
สินค้า 46
สินค้า 47
สินค้า 48
สินค้า 49
สินค้า 50
กระต่ายขูดมะพร้าวไม้เนื้อแข็ง งานแฮนด์เมดเกรดพรีเมียม หนาพิเศษ ทนทานชั่วลูกชั่วหลาน(เสริมคานกลาง)
สินค้า 52
สินค้า 53
สินค้า 54
สินค้า 55
สินค้า 56
สินค้า 57
สินค้า 58
สินค้า 59
สินค้า 60
ฟีโรโมนล่อชันโรง สวนราชินี ขนาด 100 ซีซี สกัดจากธรรมชาติด้วยแอลกอฮอล์ เข้มข้นจัดเต็ม ในขวดมีเนื้อชันแท้ๆ ฟรีขึีชัน 1ตลับ
ชิงช้าโบราณ งานทำมือ 🪵💪 ทำจาก ไม้พื้นบ้านเก่าแท้ แกร่ง ทนทาน หนาประมาณ 1 นิ้ว ขนาดกว้าง 24 × ยาว 40 ซม
สินค้า 63
สินค้า 64
สินค้า 65
สินค้า 66
สินค้า 67
สินค้า 68
สินค้า 69
สินค้า 70
สินค้า 71
สินค้า 72
สินค้า 73
สินค้า 74
สินค้า 75
สินค้า 76
สินค้า 77
สินค้า 78
สินค้า 79
สินค้า 80
สินค้า 81
สินค้า 82
สินค้า 83
สินค้า 84
สินค้า 85
สินค้า 86
สินค้า 87
สินค้า 88
สินค้า 89
สินค้า 90
สินค้า 91
สินค้า 92
สินค้า 93
สินค้า 94
สินค้า 95
สินค้า 96
สินค้า 97
สินค้า 98
สินค้า 99
สินค้า 100
สินค้า 101
สินค้า 102
สินค้า 103
สินค้า 104
สินค้า 105
สินค้า 106
สินค้า 107
สินค้า 108
สินค้า 109
สินค้า 110
สินค้า 111
สินค้า 112
สินค้า 113
สินค้า 114
สินค้า 115
สินค้า 116
สินค้า 117
สินค้า 118
สินค้า 119
สินค้า 120
สินค้า 121
สินค้า 122
สินค้า 123
สินค้า 124
สินค้า 125
สินค้า 126
สินค้า 127
สินค้า 128
สินค้า 129
สินค้า 130
สินค้า 131
สินค้า 132
สินค้า 133
สินค้า 134
สินค้า 135
สินค้า 136
สินค้า 137
สินค้า 138
สินค้า 139
สินค้า 140
สินค้า 141
สินค้า 142
สินค้า 143
สินค้า 144
สินค้า 145
สินค้า 146
สินค้า 147
สินค้า 148
สินค้า 149
สินค้า 150
สินค้า 151
สินค้า 152
สินค้า 153
สินค้า 154
สินค้า 155
สินค้า 156
สินค้า 157
สินค้า 158
สินค้า 159
สินค้า 160
สินค้า 161
สินค้า 162
สินค้า 163
สินค้า 164
สินค้า 165
สินค้า 166
สินค้า 167
สินค้า 168
สินค้า 169
สินค้า 170
สินค้า 171
สินค้า 172
สินค้า 173
สินค้า 174
สินค้า 175
สินค้า 176
สินค้า 177
สินค้า 178
สินค้า 179
สินค้า 180
สินค้า 181
สินค้า 182
สินค้า 183
สินค้า 184
สินค้า 185
สินค้า 186
สินค้า 187
สินค้า 188
สินค้า 189
สินค้า 190
สินค้า 191
สินค้า 192
สินค้า 193
สินค้า 194
สินค้า 195
สินค้า 196
สินค้า 197
สินค้า 198
สินค้า 199
สินค้า 200

ป้ายกำกับ